Standardizing Cell Viability Assessment Across Passages: A Foundational Guide for Robust and Reproducible Research
This article provides a comprehensive framework for standardizing cell viability assessment across multiple cell culture passages, a critical yet often overlooked variable in biomedical research.
Standardizing Cell Viability Assessment Across Passages: A Foundational Guide for Robust and Reproducible Research
Abstract
This article provides a comprehensive framework for standardizing cell viability assessment across multiple cell culture passages, a critical yet often overlooked variable in biomedical research. Tailored for researchers, scientists, and drug development professionals, it addresses the foundational principles, practical methodologies, common troubleshooting scenarios, and rigorous validation techniques required to ensure data integrity and reproducibility. By synthesizing current standards and best practices, this guide aims to equip laboratories with the tools to mitigate passage-induced variability, thereby enhancing the reliability of experimental outcomes in areas like drug screening, toxicology, and cancer research.
The Critical Need for Standardization: Understanding Viability and Passage-Induced Variability
Core Principles of Cell Viability Assessment
Cell viability, defined as the proportion of living, healthy cells within a given population, is a cornerstone measurement in biological research, toxicology, and drug development [1]. A cell is generally considered viable if it can perform its essential functions, whereas a cell is considered dead when it loses its plasma membrane's barrier function irreversibly, forms apoptotic bodies, or is engulfed by phagocytes [1].
The Organisation for Economic Co-operation and Development (OECD) provides a standardized classification for cell viability methods, ensuring consistency, reliability, and regulatory compliance in scientific research [1]. These methods can be categorized into four main groups based on their operating principles, as outlined in the table below.
Table 1: Categories of Cell Viability Assessment Methods Based on OECD Classification
| Category | Principle of Measurement | Example Methods |
|---|---|---|
| Non-Invasive Structural Damage | Measures markers that leak from dead cells with compromised membranes into the culture medium [1]. | Lactate Dehydrogenase (LDH) assay, Adenylate Kinase (AK) assay [1]. |
| Invasive Structural Damage | Uses dyes or markers that enter dead cells with damaged membranes [1]. | Trypan Blue, Propidium Iodide (PI), 7-AAD, Acridine Orange/Propidium Iodide (AO/PI) [1] [2]. |
| Cell Growth | Assesses the ability of viable cells to proliferate, as a dividing cell is always viable [1]. | Proliferation assays, BrdU incorporation [1]. |
| Cellular Metabolism | Measures metabolic activity as a marker of viable cells [1]. | Tetrazolium reduction assays (MTT, MTS, WST-1), resazurin reduction assays (PrestoBlue, alamarBlue), ATP detection [3] [1]. |
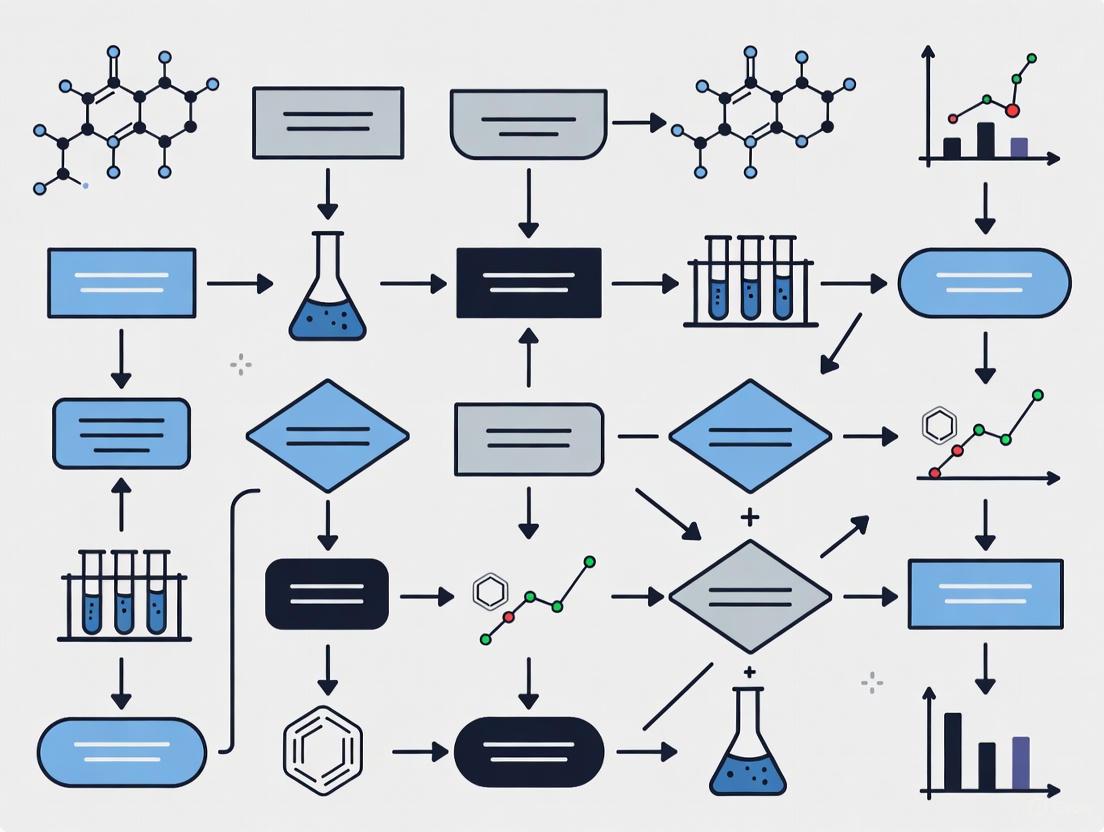
The following diagram illustrates the logical decision process for selecting an appropriate viability assay based on the experimental goals and cell characteristics.
Key Assay Methodologies and Protocols
Metabolic Activity Assays: The WST-1 Protocol
The WST-1 assay is a colorimetric method that quantitatively assesses cell viability by measuring cellular metabolic activity via mitochondrial dehydrogenases [4]. These enzymes reduce the WST-1 tetrazolium salt to a water-soluble formazan dye, and the amount of formazan produced is directly proportional to the number of viable cells [4].
Step-by-Step Protocol:
- Cell Seeding: Seed cells into the wells of a 96-well plate at an optimized density. The optimal density should be determined empirically for each cell line [4].
- Incubation: Incubate the cells under standard culture conditions (e.g., 37°C, 5% CO₂) for the desired experimental period (e.g., 24–96 hours) [4].
- Reagent Addition: Add WST-1 reagent directly to each well. A typical volume is 10 µL per 100 µL of culture medium, but manufacturer instructions should be followed [4].
- Control Setup: Include appropriate control wells:
- Blank: Culture medium and WST-1 reagent only (no cells).
- Untreated Control: Cells and culture medium without test compounds.
- Positive/Negative Controls: Cells treated with a known cytotoxic agent or growth factor [4].
- Incubation with WST-1: Incubate the plate under standard conditions for 0.5 to 4 hours. Monitor color development to determine the ideal endpoint [4].
- Absorbance Measurement: Measure the absorbance using a microplate reader. The optimal absorption for WST-1 formazan is between 440-450 nm, with a reference wavelength above 600 nm recommended for background correction [4].
Membrane Integrity Assays: AO/PI Staining for Fluorescence-Based Cell Counting
The Acridine Orange (AO)/Propidium Iodide (PI) staining method uses fluorescent dyes to distinguish between live and dead cells based on membrane integrity [5]. AO enters all cells and stains nucleic acids green, while PI only enters cells with compromised membranes and stains nucleic acids red, providing a high-contrast viability map [5].
This method is known for its low cytotoxicity and excellent staining stability over time, making it suitable for automated counting and high-throughput workflows [5].
Troubleshooting Common Assay Problems
This section addresses frequently encountered issues in cell viability assays, providing targeted solutions to ensure data reliability and reproducibility, which is crucial for standardization across research passages.
Low or Erratic Signal
Low signal can occur across various assay types and often relates to reagent handling or cell health.
- Problem: Low fluorescence in resazurin-based assays (e.g., PrestoBlue).
- Solution: Increase the incubation time with the reagent, check the instrument's gain/voltage and filter settings, and ensure positive controls (living cells) are included for troubleshooting [6].
- Problem: Low signal in click chemistry-based proliferation or apoptosis assays.
- Solution: Ensure the click reaction mixture is used immediately after preparation. Verify that cells are adequately fixed and permeabilized. Do not include metal chelators (e.g., EDTA) in any buffers prior to the click reaction, as they can bind the necessary copper catalyst [7].
- Problem: Erratic readings across the plate in colorimetric or fluorescent assays.
- Solution: This can be caused by precipitated dye or pipetting errors. Warm the reagent to 37°C and mix thoroughly to ensure a homogeneous solution. Calibrate pipettes and ensure pipette tips are securely attached [6].
High Background or Signal Saturation
Excessive signal can obscure data and reduce the dynamic range of an assay.
- Problem: High background fluorescence in resazurin-based assays.
- Solution: The reagent may be degrading due to light exposure. Store the reagent in the dark and avoid prolonged exposure to direct light [6].
- Problem: Fluorescence values are beyond the instrument's linear range.
- Solution: Decrease the incubation time with the reagent or reduce the number of cells used per well [6].
Issues with Specific Cell Types or Samples
The choice of viability stain is critical, especially for sensitive cells or complex samples.
- Problem: Trypan Blue is cytotoxic to sensitive cells like PBMCs or iPSCs, causing viability to drop significantly within 15-30 minutes [5].
- Solution: Switch to a lower-toxicity stain. For brightfield counters, use Erythrosin B. For fluorescence-based systems, use AO/PI or FDA/PI, which offer greater stability and accuracy for sensitive cells [5].
- Problem: Non-specific binding in flow cytometry, often caused by non-viable cells.
- Solution: Use a fluorescent viability dye like PI or 7-AAD to gate out non-viable cells. Stain cells prior to fixation, as fixation permeabilizes all membranes [2].
Research Reagent Solutions
Selecting the right reagents is fundamental to successful and standardized viability assessment. The table below details key reagents and their applications.
Table 2: Essential Reagents for Cell Viability Assessment
| Reagent Name | Category (Principle) | Key Features and Applications |
|---|---|---|
| WST-1 [4] | Metabolic Activity (Tetrazolium reduction) | Water-soluble formazan; no solubilization step; higher sensitivity than MTT; suitable for high-throughput screening. |
| PrestoBlue / alamarBlue [6] | Metabolic Activity (Resazurin reduction) | Non-toxic; allows real-time, kinetic monitoring of the same sample over several days; works with 3D culture systems. |
| Trypan Blue (TB) [5] | Membrane Integrity (Dye exclusion) | Chromogenic dye; cost-effective; common for manual counting. Caution: Can be cytotoxic to sensitive cells, leading to viability overestimation if counting is delayed. |
| Erythrosin B (EB) [5] | Membrane Integrity (Dye exclusion) | Chromogenic dye; lower cytotoxicity and longer staining window than Trypan Blue; ideal for brightfield automated cell counters. |
| Acridine Orange/Propidium Iodide (AO/PI) [5] | Membrane Integrity (Dye inclusion/exclusion) | Fluorescent stain; high contrast and stability; ideal for automated fluorescence counters and flow cytometry; minimal cytotoxicity. |
| Propidium Iodide (PI) [2] | Membrane Integrity (Dye inclusion) | Fluorescent DNA stain; used in flow cytometry to identify dead cells; must be used before fixation. |
| Lactate Dehydrogenase (LDH) Assay [1] | Membrane Integrity (Enzyme release) | Measures enzyme released from damaged cells; useful for cytotoxicity studies. |
FAQs on Cell Viability Standardization
Why is it critical to assess and exclude non-viable cells in flow cytometry? Non-viable cells can bind antibodies non-specifically and exhibit unusual autofluorescence, which can lead to the misidentification of cell populations and inaccurate quantification in assays like T-cell subset or CD34+ stem cell enumeration [2].
My PrestoBlue reagent froze accidentally. Is it still usable? Yes. PrestoBlue reagent is stable through multiple freeze-thaw cycles. Thaw the reagent and then warm it in a 37°C water bath, mixing it thoroughly to ensure all components are completely in solution before use [6].
When should I use WST-1 over MTT? WST-1 is generally preferred over MTT due to its higher sensitivity, faster results, and because it produces a water-soluble formazan product that eliminates the need for a solubilization step with organic solvents [4]. The MTT assay is also known to have higher cytotoxicity to cells [3].
How do I choose between a metabolic assay (like WST-1) and a membrane integrity assay (like AO/PI)? The choice depends on your experimental endpoint. Use metabolic assays to measure cellular health and function. Use membrane integrity assays when your primary concern is distinguishing live from dead cells for accurate counting or when studying processes that directly damage the cell membrane. For the most comprehensive view in critical experiments, using methods from both categories can be beneficial.
Are there international standards for cell viability methods? Yes. The International Organization for Standardization (ISO) is developing ISO/DIS 8934-1, which specifies definitions and general requirements for cell viability analytical methods to ensure they are fit-for-purpose and to manage sources of variability [8]. Furthermore, the OECD provides a classification system that is critical for regulatory compliance [1].
The Impact of Cell Passage on Phenotype, Function, and Viability Assay Outcomes
Frequently Asked Questions
Q1: What are the concrete consequences of using a high-passage cell line in my experiments?
Using high-passage cell lines can lead to significant alterations in your experimental outcomes. Documented consequences include:
- Phenotypic and Genotypic Changes: Over-subcultured cells experience "genetic drift," leading to changes in their phenotype and genotype. They may no longer be accurate models of the original source material [9] [10].
- Altered Transfection Efficiency: The effect is cell-line dependent. For instance, transfection efficiency can increase in some lines (e.g., Caco-2 after >25 passages) but decrease in others (e.g., MCF-7 after >25 passages) [9].
- Reduced Cell-Specific Function: In primary bovine luteal cells, higher passages (P15, P30) showed severely reduced expression of marker genes (e.g., STAR, LHCGR), significantly lower progesterone synthesis, and reduced cell proliferation compared to early-passage cells [11].
- Genomic Instability: Jurkat E6-1 cell populations exhibit marked karyotypic heterogeneity and genomic changes with increased passages, which are associated with differences in protein expression and functional assays [12].
Q2: My viability assay results are inconsistent between different cell preparations. Could cell passage number be a factor?
Yes, passage number is a critical factor that can significantly impact viability assay results. The metabolic state of cells changes with passage, which directly affects many common viability assays.
- Metabolic Assay Interference: Research shows that the Cell Counting Kit-8 (CCK-8), a tetrazolium-based assay, induces significant intracellular metabolic changes in treated cells, notably down-regulating metabolites in glycolysis and the pentose phosphate pathway [13]. These metabolic alterations, which can vary with cell passage, predominantly affect energy metabolism and the cellular redox environment, potentially misleading subsequent results if those same cells are used in further experiments [13].
- Assay Principle Matters: Viability assays based on different principles (e.g., metabolic activity like MTT, membrane integrity like trypan blue, or ATP content) can be differently affected by passage-induced changes in cell physiology. For example, a cell might be viable but have a reduced metabolic rate at high passage, giving a falsely low signal in an MTT assay [14] [3].
Q3: Is there a universal "safe" passage number limit for cell cultures?
There is no universal safe passage number; the stability of a cell line during in vitro passaging is highly cell-line dependent [10].
- General Guidelines: As a rule of thumb, low-passage cells (generally below passage 15) are more likely to maintain characteristics closer to their tissue of origin. High-passage cells (often above passage 40) are more prone to altered morphology, growth rates, and genetic drift [10].
- Cell-Specific Sensitivity: Robust lines like A549 may withstand extensive subculturing, while specialized cells like neuronal SH-SY5Y can show pronounced alterations in marker expression after relatively few passages [10]. The only way to determine the acceptable passage range for your specific cell line and application is to perform functional characterization at different passages.
Q4: How does long-term cryopreservation affect cell viability and phenotype after thawing?
The impact of cryopreservation depends heavily on the cryoprotective agent (CPA) used. Studies on human adipose-derived stem cells (ASCs) show that with an optimized CPA, cells can maintain high viability, normal phenotype, and proliferation rate after long-term storage (3 months) [15].
Crucially, cryopreserved ASCs also maintained their differentiation capability (adirogenic, osteogenic, chondrogenic) and showed enhanced expression of stemness markers (NANOG, OCT-4). Findings suggest that a medium with 5% DMSO without FBS can be an efficient CPA, maintaining functional properties while moving towards a xeno-free formulation for clinical applications [15].
Quantitative Data on Passage-Induced Changes
Table 1: Functional Changes in Bovine Luteal Cells Across Passages
This table summarizes key experimental findings from primary cell cultures, demonstrating the direct impact of repeated passaging on specialized cell functions [11].
| Passage Number | Steroidogenic Marker Expression | Progesterone (P4) Synthesis | Cell Proliferation |
|---|---|---|---|
| Early Passage (P3) | Retained expression of STAR, HSD3B1, LHCGR | High | High |
| Intermediate Passage (P15) | Severely reduced | Significantly reduced | Significantly reduced |
| High Passage (P30) | Severely reduced | Significantly reduced | Significantly reduced |
This table compiles data from genomic, transcriptomic, and functional analyses of Jurkat cells obtained from different laboratories, highlighting substantial inter- and intra-population heterogeneity linked to passage history and genomic instability [12].
| Cell Source | Karyotypic Heterogeneity | Transcriptomic Profile | Functional Variation |
|---|---|---|---|
| Reference (ATCC, low passage) | Baseline (as per supplier) | Baseline | Baseline immunophenotype and cytokine production |
| Lab 1 (>20 years in culture) | Marked differences from ATCC reference | Varied markedly from reference | Substantial variations in immunophenotype and cytokine production |
| Lab 2 (Estimated passage >20 upon acquisition) | Marked differences from ATCC reference | Varied markedly from reference | Substantial variations in immunophenotype and cytokine production |
| Lab 3 (Passage not documented) | Marked differences from ATCC reference | Varied markedly from reference | Substantial variations in immunophenotype and cytokine production |
Essential Experimental Protocols
Protocol 1: Passaging Monolayer Cultures with Enzymatic Dissociation
This is a standard protocol for subculturing adherent cell lines [9].
- Rinse: Remove the spent culture medium. Rinse the cell sheet with a trypsin-EDTA solution (e.g., 0.25% trypsin with 0.03% EDTA) and remove the rinse.
- Dissociate: Add a small volume of fresh trypsin-EDTA solution to cover the cell sheet. Observe the cells under a microscope until the cell layer is dispersed (typically 1-15 minutes).
- Neutralize: Add complete growth medium containing serum to the flask to inactivate the trypsin. Gently pipette the solution to dissociate any remaining cell clusters and create a single-cell suspension.
- Subculture: Count the cells and seed (subculture) them into new culture vessels at the recommended density.
Protocol 2: MTT Cell Viability Assay
This protocol is for a common endpoint metabolic viability assay [3].
Materials:
- MTT Solution: 3-(4,5-dimethylthiazol-2-yl)-2,5-diphenyltetrazolium bromide, dissolved at 5 mg/ml in DPBS, filter-sterilized.
- Solubilization Solution: 40% dimethylformamide (DMF), 2% glacial acetic acid, 16% sodium dodecyl sulfate (SDS), pH adjusted to 4.7.
Procedure:
- After treatment, prepare the MTT reagent by diluting the stock solution in culture medium to a final concentration of 0.2 - 0.5 mg/ml.
- Remove the existing culture medium from cells in a multi-well plate and replace it with the MTT-containing medium. Incubate for 1 to 4 hours at 37°C.
- After the incubation, carefully remove the MTT medium. Add the solubilization solution to each well to dissolve the formed purple formazan crystals.
- Mix gently until the crystals are fully dissolved and the color is homogeneous.
- Record the absorbance at 570 nm using a plate-reading spectrophotometer. A reference wavelength of 630 nm can be used to subtract background.
Technical Note: The MTT assay measures metabolic activity as a marker of viable cells. However, culture conditions that alter cellular metabolism (e.g., contact inhibition, nutrient depletion, or high passage number) will affect the rate of MTT reduction, independent of actual cell number [3].
The Scientist's Toolkit: Key Research Reagents & Materials
| Item | Function / Application | Example Use-Case |
|---|---|---|
| Trypsin-EDTA Solution | Proteolytic enzyme mixture for dissociating adherent cells from culture surfaces. | Standard subculturing of monolayer cultures [9]. |
| ReLeSR | Enzyme-free dissociation reagent for passaging human pluripotent stem cells as aggregates. | Gentle passaging of ES and iPS cells to maintain pluripotency [16]. |
| Cell Counting Kit-8 (CCK-8) | Tetrazolium-based colorimetric assay (WST-8) for estimating viable cell number. | High-throughput screening of cell proliferation or cytotoxicity [13]. |
| Dimethyl Sulfoxide (DMSO) | Cryoprotective agent (CPA) that prevents ice crystal formation during freezing. | Standard component of cryopreservation media for long-term cell storage [15]. |
| Fetal Bovine Serum (FBS) | Complex supplement for growth media; also used as a component in some cryomedia. | Provides growth factors, hormones, and attachment factors for cell culture. Its use in cryomedia is being re-evaluated for clinical applications [15]. |
| Trehalose | A natural disaccharide sugar that can act as a CPA. | Being investigated as a potential xeno-free component in cryopreservation media [15]. |
| Resazurin | Cell-permeable dye used in metabolic viability assays. Viable cells reduce blue resazurin to pink, fluorescent resorufin. | Monitoring cell proliferation over time in a non-destructive manner [15]. |
| Propidium Iodide / SYTOX Dyes | Membrane-impermeant DNA dyes that only enter cells with compromised plasma membranes. | Flow cytometry or fluorescence microscopy to identify dead cells in a population [14]. |
Visualizing Metabolic Impact of a Common Viability Assay
The diagram below illustrates the key metabolic pathways affected by the CCK-8 assay, based on targeted metabolomics profiling. This interference is a critical consideration when standardizing viability assessments [13].
CCK-8 Assay Metabolic Impact Diagram: This workflow shows how the CCK-8 assay consumes reducing equivalents (NAD(P)H), leading to downstream effects on critical energy-producing pathways and the cellular antioxidant system [13].
Troubleshooting Common Experimental Issues
Problem: Unexpected results in a viability assay after scaling up cell culture.
- Potential Cause: Phenotypic drift due to an unrecorded increase in passage number.
- Solution: Implement strict documentation of population doubling levels (PDLs) or passage numbers. Always use cells within a pre-defined and validated passage range for critical experiments. Perform regular functional checks (e.g., growth curve analysis, marker expression) on your cell stocks [9] [10].
Problem: High background or inconsistent signal in a trypan blue-based viability measurement.
- Potential Cause: Inconsistent image focus or suboptimal image analysis parameter settings on an automated cell counter.
- Solution: Use control materials (e.g., beads) to benchmark image quality and ensure a reproducible focal plane. Systematically optimize image analysis parameters (e.g., cell size, brightness, sharpness) using a Design of Experiments (DOE) approach, especially when analyzing health-compromised cell populations [17].
Why Standardization is Non-Negotiable for Reproducibility in Preclinical Research
The Reproducibility Crisis: A Quantitative Look
Preclinical research faces a significant reproducibility crisis, which undermines the reliability of scientific findings and their translation into effective human therapies. The data below summarizes evidence from key investigations.
Table 1: Documented Rates of Irreproducibility in Preclinical Research
| Field of Study | Reproducibility Rate | Context and Source |
|---|---|---|
| Oncology (Landmark Studies) | 11% (6 of 53 studies) | Amgen scientists could confirm findings in only 6 of 53 "landmark" published studies during internal validation attempts [18]. |
| Psychology | 36% (36 of 100 studies) | A collaboration to repeat 100 studies found only 36% of replications had statistically significant results, with effect sizes roughly halved [19]. |
| General Preclinical Research | ~25% (20-25% of studies) | A report from Bayer HealthCare indicated that only about one-quarter of published preclinical studies could be validated to the point where projects could continue [18]. |
A 2016 survey of Nature readers, predominantly laboratory scientists, found that more than half felt there was a "significant crisis" of reproducibility [19]. The causes are systemic and varied, as shown below.
Table 2: Major Causes of the Reproducibility Crisis (from a survey of scientists) [19]
| Rank | Cause of Irreproducibility |
|---|---|
| 1 | Selective reporting |
| 2 | Pressure to publish |
| 3 | Low statistical power or poor analysis |
| 4 | Insufficient replication within the original laboratory |
| 5 | Insufficient oversight/mentoring |
| 6 | Methods/code unavailable |
| 7 | Poor experimental design |
| 8 | Raw data not available |
| 9 | Fraud |
| 10 | Difficulties with peer review |
Technical Support Center: FAQs and Troubleshooting Guides
This section addresses specific, common issues researchers encounter regarding standardization and reproducibility in preclinical research, with a focus on viability assessment.
FAQ 1: What are the most critical steps to ensure my cell viability assays are reproducible?
Answer: Reproducible cell viability assays depend on strict standardization across several domains:
- Assay Selection and Validation: Choose an assay whose principle (e.g., metabolic activity, membrane integrity) aligns with your biological question and context of use. Critically evaluate its limitations [14].
- Standard Operating Procedures (SOPs): Develop and meticulously follow SOPs for cell culture, passaging, assay execution, and data analysis. A 2022 survey found that while 68% of preclinical imaging labs use SOPs for acquisition, only 40% use them for analysis, highlighting a key area for improvement [20].
- Reagent and Model Control: Use rigorously validated and characterized reagents, antibodies, and cell lines. Document all source and batch information [18].
- Data Management: Maintain an auditable record from raw data to final analysis. This includes keeping original data files, analysis files, and all data management programs used for cleaning and processing [19].
FAQ 2: My team cannot reproduce a published finding. Where should we start troubleshooting?
Answer: Follow this structured troubleshooting guide to diagnose the issue.
Table 3: Troubleshooting Guide for Irreproducible Results
| Problem Area | Checklist for Investigation | Potential Solution |
|---|---|---|
| Experimental Protocol | Are all reagents (antibodies, cell lines, chemicals) identical and from the same source? Are all incubation times, temperatures, and passage numbers exactly the same? Is the equipment (imagers, plate readers) calibrated the same way? | Contact the original authors to discuss protocols and exchange reagents if possible [18]. Implement and document detailed SOPs. |
| Data Analysis | Are you using the same raw data processing and statistical analysis methods? Were the original results based on a single experiment or a representative dataset? | Request the original analysis code or raw data. Pre-specify your data analysis plan to avoid selective reporting [19]. |
| Biological Model | Are the animal/cell models genetically identical and maintained under the same conditions? For in vivo work, are environmental factors (light/dark cycles, diet, noise) controlled? | Implement digital home cage monitoring to minimize human-interference and better characterize model variability [21]. Use more than one well-characterized model for critical experiments [18]. |
| Reporting | Does the original publication describe the entire dataset, including experiments where the hypothesis was not confirmed? | Be critical of "perfect" stories. For your work, commit to reporting all data, including negative controls and contradictory findings [18]. |
FAQ 3: Our lab is trying to improve reproducibility. What international guidelines should we follow?
Answer: Several key guidelines provide a framework for rigorous and reproducible research. Awareness of these is the first step, as a 2022 survey showed that 46% of preclinical imaging researchers were not aware of the ARRIVE guidelines, and the majority were unaware of the FAIR data principles [20].
- ARRIVE Guidelines (Animal Research: Reporting of In Vivo Experiments): Essential for planning and reporting animal studies to ensure the reliability and reproducibility of results [20] [21].
- PREPARE Guidelines (Planning Research and Experimental Procedures on Animals): Focus on the pre-experimental planning phase to improve the design of animal studies and align with the 3Rs (Replacement, Reduction, Refinement) [21].
- FAIR Principles (Findable, Accessible, Interoperable, Reusable): A framework for data management and stewardship to ensure data can be effectively used by both humans and machines [20] [22] [23]. Adhering to these principles is a cornerstone of modern data sharing.
Standardized Experimental Protocols for Cell Viability Assessment
Standardizing methodologies is crucial. The Organisation for Economic Co-operation and Development (OECD) provides a useful classification for cell viability methods, which can guide assay selection and reporting [14].
OECD Cell Viability Assessment Workflow
Detailed Protocol: Lactate Dehydrogenase (LDH) Release Assay
This protocol is for a standardized, non-invasive method to assess cell viability based on membrane integrity [14].
Principle: LDH is a stable cytoplasmic enzyme present in all cells. Upon cell membrane damage, LDH is released into the cell culture supernatant. The measured LDH activity in the supernatant is directly proportional to the number of dead or damaged cells.
The Scientist's Toolkit: Key Reagents and Equipment
Table 4: Essential Reagents and Equipment for LDH Assay
| Item | Function / Specification | Notes for Standardization |
|---|---|---|
| LDH Assay Kit | Provides optimized reagents for the enzymatic reaction. | Use the same commercial kit and lot number for a series of comparable experiments. |
| Cell Culture Plates | 96-well plate format. | Use plates from the same manufacturer to ensure consistent well dimensions and optical properties. |
| Microplate Reader | Capable of measuring absorbance (often at 490nm with a reference at 600-650nm). | Calibrate the reader before each use. Use the same instrument settings across experiments. |
| Lysis Buffer | (Included in kit) Used to obtain maximum LDH release for the positive control. | Ensure complete lysis by following kit instructions precisely for incubation time. |
| Multichannel Pipette | For accurate and reproducible liquid handling. | Calibrate pipettes regularly. Use the same pipettes and tips for replicate samples. |
Step-by-Step Workflow:
Sample Preparation:
- Seed cells in a 96-well plate and treat them according to your experimental design. Include the following controls in triplicate:
- Background Control: Culture medium without cells.
- Low Control (Spontaneous LDH): Untreated cells (measures background cell death).
- High Control (Maximum LDH): Cells treated with lysis buffer provided in the kit (measures total LDH content).
- Compound Control: Treatment compounds in medium without cells to check for interference.
- After treatment, centrifuge the plate at 250 × g for 5 minutes to pellet cells and debris.
- Seed cells in a 96-well plate and treat them according to your experimental design. Include the following controls in triplicate:
LDH Reaction:
- Carefully transfer a defined volume (e.g., 50 µL) of the supernatant from each well to a new, clear 96-well plate.
- Add an equal volume of the LDH reaction mixture from the kit to each well.
- Incubate the plate for a specified time (typically 15-30 minutes) at room temperature, protected from light.
Signal Detection and Data Analysis:
- Stop the reaction as per the kit's instructions (often with a stop solution).
- Measure the absorbance at the recommended wavelengths (e.g., 490 nm and 650 nm as a reference) using a microplate reader.
- Calculate % Cytotoxicity:
% Cytotoxicity = (Experimental LDH - Low Control LDH) / (High Control LDH - Low Control LDH) × 100
Troubleshooting Notes:
- High Background in Low Control: This indicates excessive baseline cell death. Optimize cell culture conditions and seeding density, and ensure handling is gentle.
- Signal Saturation: If the experimental values are close to the maximum control, dilute the supernatant and repeat the assay.
- Compound Interference: If the compound control shows high signal, the test compound may interfere with the assay chemistry. Consider an alternative viability method from a different OECD category [14].
Overcoming the reproducibility crisis requires a fundamental shift in research culture. It is no longer sufficient to focus solely on discovery; the biomedical research community must embrace a culture where rigor + transparency = reproducibility [19]. This involves senior investigators taking greater ownership of laboratory practices, institutions and funders rewarding robust and reproducible science over "perfect" stories, and the widespread adoption of standards, guidelines, and modern data management practices like the FAIR principles. By making standardization non-negotiable, we can restore trust in preclinical research and accelerate the translation of scientific discoveries into real-world patient benefits.
Frequently Asked Questions (FAQs)
1. What is the VBNC state, and why is it a significant challenge in research and diagnostics? The Viable but Non-Culturable (VBNC) state is a dormant survival strategy employed by bacteria in response to environmental stress, such as nutrient deprivation, temperature shifts, or exposure to antibiotics and disinfectants [24] [25]. Cells in the VBNC state have reduced metabolic activity, are non-proliferative, and cannot form colonies on routine culture media, yet they maintain viability and an intact cell membrane [24] [26]. This poses a major challenge because standard, culture-based diagnostic methods return false negatives, allowing VBNC pathogens like Escherichia coli, Listeria monocytogenes, and Mycobacterium tuberculosis to evade detection, only to potentially resuscitate and cause infections later [24] [25] [26].
2. How does cellular senescence interfere with long-term cell culture studies? Cellular senescence is a state of irreversible growth arrest that occurs in response to various stressors, including DNA damage and telomere shortening [27]. In long-term culture, the accumulation of senescent cells can skew experimental outcomes because these cells are not proliferating but remain metabolically active and secrete a complex mixture of factors known as the Senescence-Associated Secretory Phenotype (SASP) [27]. The SASP can alter the local microenvironment, affecting the behavior and viability of neighboring cells in the culture and leading to inconsistent results across passages [27].
3. What are the primary molecular mechanisms that can induce the VBNC state in a laboratory setting? The entry into the VBNC state is often regulated by genetic systems that respond to stress. One well-described mechanism involves type II toxin-antitoxin (TAS) systems [24]. Under normal conditions, a toxin and its corresponding antitoxin form a non-toxic complex. Under stress, the unstable antitoxin is degraded, freeing the toxin to act on cellular targets. This leads to a sharp decrease in translation, replication, and cell growth, thereby inducing the VBNC state and dramatically increasing antimicrobial tolerance [24]. Other regulators, such as rpoS (a stress response sigma factor), also play important roles [24].
4. My flow cytometry data shows high background fluorescence. What could be the cause, and how can I resolve it? High background in flow cytometry can stem from several sources [28] [29]:
- Presence of dead cells: Dead cells can bind antibodies non-specifically. Resolution: Use a viability dye (e.g., PI, 7-AAD, or a fixable viability dye) to gate out dead cells during analysis [28].
- Too much antibody: An excessive antibody concentration can lead to non-specific binding. Resolution: Titrate your antibodies to determine the optimal concentration for your specific cell type and staining protocol [28].
- Fc receptor binding: Some cells, like monocytes, express Fc receptors that can bind the Fc portion of antibodies. Resolution: Block cells with Bovine Serum Albumin, an Fc receptor blocking reagent, or normal serum from the host species of your primary antibody prior to staining [28].
5. What methods can reliably detect viability in non-growing cells like those in the VBNC state or senescence? Since culture-based methods fail for VBNC cells and do not indicate viability for senescent cells, alternative methods are required. A multi-parameter approach is recommended, as no single method is perfect. Key techniques include [24] [25] [26]:
- Adenosine Triphosphate (ATP) Detection: This measures the de novo production of ATP, a key indicator of metabolic activity. The BacTiter-Glo assay is an example used to determine the "minimum ATP inhibitory concentration" for VBNC cells [25].
- Membrane Integrity Staining: Using fluorescent dyes (e.g., propidium iodide) that are excluded by cells with intact membranes can help distinguish viable from dead cells [24].
- Reverse Transcription quantitative PCR (RT-qPCR): This method detects messenger RNA (mRNA) from specific genes, indicating active gene expression and viability, even in cells that cannot be cultured [26].
- Next-Generation Sequencing (NGS): NGS can detect and identify the DNA of VBNC bacteria in a culture-independent manner, which is particularly useful for complex samples [26].
Troubleshooting Guides
Table 1: Troubleshooting VBNC State Experiments
| Problem | Possible Causes | Recommended Solutions |
|---|---|---|
| Failure to induce VBNC state | Insufficient stress application; Incorrect stressor for the bacterial species. | Optimize stress conditions (e.g., temperature, nutrient starvation, antimicrobial concentration) based on published protocols for your specific strain [25]. |
| Inability to confirm VBNC state | Reliance on culture-based methods only. | Implement a combination of viability stains (e.g., ATP assay, membrane integrity dyes) and molecular methods (qPCR) to confirm metabolic activity in the absence of culturability [24] [25]. |
| High variability in resuscitation | Inconsistent or suboptimal resuscitation conditions. | Standardize resuscitation protocols; ensure the removal of the inducing stressor and provide optimal nutrient and temperature conditions known to support recovery for the specific species [24]. |
| Unexpected antimicrobial tolerance | Testing only culturable cells; VBNC subpopulation is highly tolerant. | Apply ATP-based VBNC-MIC assays to specifically evaluate the tolerance of the non-culturable population to antibiotics and disinfectants [25]. |
Table 2: Troubleshooting Cellular Senescence Assays
| Problem | Possible Causes | Recommended Solutions |
|---|---|---|
| Low signal in SA-β-Gal staining | Incorrect pH of staining solution; Cells not sufficiently senescent. | Ensure the staining solution is at pH 6.0; Use a positive control, such as cells treated with a known senescence-inducer (e.g., etoposide or hydrogen peroxide) [27]. |
| Heterogeneous senescence in culture | Uneven exposure to stress; Genetic drift over multiple passages. | Apply a uniform, validated stressor to the entire culture; regularly authenticate and monitor cell lines to account for population changes. |
| Difficulty distinguishing senescence from quiescence | Assays measuring only growth arrest. | Utilize multi-parameter assays that combine a marker of proliferation arrest (e.g., lack of EdU incorporation) with a positive marker of senescence (e.g., SASP factor detection or p16INK4a expression) [27]. |
Experimental Protocols
Protocol 1: Determining Minimum ATP Inhibitory Concentration (MAIC) for VBNC Cells
This protocol allows for the assessment of antimicrobial tolerance in VBNC cells without the need for resuscitation [25].
Key Research Reagent Solutions:
- BacTiter-Glo Microbial Cell Viability Assay: Used to measure ATP production as an indicator of cell viability.
- Brain Heart Infusion (BHI) Broth: Standard growth medium for bacterial culture.
- Antimicrobial Agents: The antibiotics, disinfectants, or preservatives to be tested.
Methodology:
- Induce VBNC State: Grow bacteria to early log phase (OD600 ~0.6). Centrifuge and resuspend the pellet in a stress condition known to induce the VBNC state for your species (e.g., specific heat stress, nutrient starvation, or presence of a biocide). Incubate for 1 hour at room temperature [25].
- Confirm VBNC State: Pellet and wash the cells. Resuspend in fresh BHI medium. Confirm loss of culturability by plating on solid media and confirm viability/metabolic activity using the BacTiter-Glo assay or membrane integrity staining [25].
- MAIC Testing: In a 96-well microtiter plate, prepare serial dilutions of the antimicrobial agent. Inoculate each well with the confirmed VBNC cell suspension.
- ATP Measurement: After an appropriate incubation period, add the BacTiter-Glo reagent to each well. Measure the luminescence, which is proportional to the amount of ATP present.
- Data Analysis: The MAIC is defined as the lowest concentration of the antimicrobial that inhibits de novo ATP production in the VBNC cells, indicating a loss of metabolic viability [25].
Protocol 2: Flow Cytometry for Simultaneous Viability and Surface Marker Analysis
This protocol is crucial for analyzing mixed populations, such as senescent cells within a larger culture.
Key Research Reagent Solutions:
- Fixable Viability Dye (e.g., eFluor dyes): These dyes covalently bind to amines in dead cells and withstand fixation, allowing you to gate out dead cells during analysis.
- Fluorochrome-conjugated Antibodies: Antibodies against your target surface or intracellular markers.
- Fixation/Permeabilization Buffer (e.g., ice-cold 90% Methanol): For intracellular staining of markers like p16INK4a or other senescence-associated proteins.
Methodology:
- Harvest and Stain Viability: Harvest cells and resuspend in a buffer containing the fixable viability dye. Incubate as per manufacturer's instructions. Wash cells to remove excess dye [28].
- Surface Staining: Resuspend the cell pellet in a blocking buffer (e.g., BSA or serum) to prevent non-specific Fc receptor binding. Add fluorochrome-conjugated antibodies against your surface markers of interest. Incubate, then wash.
- Fixation and Permeabilization: Fix cells with a cross-linking fixative like 4% formaldehyde (methanol-free). For intracellular targets, permeabilize the cells by adding ice-cold 90% methanol drop-wise while gently vortexing. This step is critical for preserving cell morphology and allowing antibody access to intracellular proteins [28].
- Intracellular Staining: Wash cells to remove methanol. Proceed with staining for intracellular targets using appropriately conjugated antibodies.
- Flow Cytometry Analysis: Resuspend cells in a suitable buffer and acquire data on the flow cytometer. Use the viability dye to exclude dead cells from your final analysis of the target markers.
Data Presentation
Table 3: Comparison of Viability Assessment Methods for Non-Growing Cells
| Method | Principle | Applicability to VBNC | Applicability to Senescence | Key Advantages | Key Limitations |
|---|---|---|---|---|---|
| Culture-Based Plating | Ability to proliferate and form colonies. | No (by definition) [24] | No (cells are growth-arrested) | Gold standard for culturable cells; simple. | Completely fails for non-growing states. |
| ATP Detection | Measures cellular ATP levels as indicator of metabolic activity. | Yes [25] | Yes | Highly sensitive; fast and quantitative. | Does not distinguish between cell types; can be influenced by metabolic state. |
| Membrane Integrity Staining | Distinguishes intact (viable) from compromised (dead) membranes. | Yes [24] | Yes | Simple and rapid; works with flow cytometry. | May not detect all viable cells; can be subjective. |
| qPCR/RTPCR | Detects presence or expression of specific genes. | Yes (for DNA or mRNA) [26] | Yes (for senescence-associated transcripts) | Highly specific and sensitive; culture-independent. | Does not confirm protein activity; RNA can be unstable. |
| SA-β-Gal Staining | Detects lysosomal β-galactosidase activity at suboptimal pH. | No | Yes (a widely used biomarker) [27] | Simple histochemical stain. | Can be influenced by cell confluence and culture conditions; not exclusive to senescence. |
Signaling Pathways and Experimental Workflows
Diagram 1: VBNC State Induction and Key Detection Methods
Diagram 2: Key Molecular Hallmarks of Cellular Senescence
A Practical Toolkit: Selecting and Implementing Viability Assays Across Passages
The Organisation for Economic Co-operation and Development (OECD) provides a standardized classification system for cell viability methods, ensuring consistency, reliability, and regulatory compliance in scientific research globally [14]. These standardized methods are widely accepted for chemical safety testing and are integral to the Council Decision on the Mutual Acceptance of Data [30].
This classification system is particularly valuable for researchers aiming to standardize viability assessments across multiple passages, as it offers a structured framework to categorize methods based on their fundamental principles. By adopting this framework, laboratories can improve the reproducibility of their results, a critical factor in pre-clinical drug screening and cellular research [31] [14].
The OECD categorizes cell viability methods into four primary groups based on what they measure: non-invasive cell structure damage, invasive cell structure damage, cell growth, and cellular metabolism [14]. Understanding these categories helps researchers select the most appropriate assay for their specific experimental needs and endpoints.
OECD Classification Framework: Categories and Principles
The table below summarizes the four OECD categories of cell viability methods, their operating principles, and common examples.
Table 1: OECD Classification of Cell Viability Methods
| OECD Category | Principle of Measurement | Common Examples | Key Endpoint |
|---|---|---|---|
| Structural Cell Damage (Non-Invasive) | Measures markers that leak out of dead cells due to loss of membrane integrity [14]. | Lactate Dehydrogenase (LDH) release [14] [32], Adenylate Kinase (AK) release [14]. | Quantification of extracellular enzymes correlating with dead cells. |
| Structural Cell Damage (Invasive) | Measures markers that enter non-viable cells with compromised membranes (inward direction) [14]. | Trypan Blue exclusion [14], Propidium Iodide staining [14] [32], esterase-cleaved dyes (e.g., Calcein AM) [14]. | Distinction of viable vs. non-viable cells based on membrane permeability. |
| Cell Growth | Assesses the ability of cells to proliferate, as a dividing cell is considered viable [14]. | Proliferation assays, BrdU incorporation [14]. | Measurement of population doubling or DNA synthesis. |
| Cellular Metabolism | Measures metabolic activity as a key marker of healthy, viable cells [3]. | Tetrazolium reduction (MTT, MTS) [3] [32], Resazurin reduction [31] [32], ATP detection [32]. | Quantification of metabolic flux or energy status. |
The logical relationships between these categories and their specific methods can be visualized in the following diagram:
Figure 1: OECD Viability Methods Classification. This diagram illustrates the four main categories of viability tests as classified by the OECD and their common assay examples.
Detailed Methodologies and Protocols
Resazurin Reduction Assay (Metabolism-Based)
The resazurin assay is a popular metabolism-based method that measures the ability of viable cells to reduce the blue, non-fluorescent dye resazurin into pink, fluorescent resorufin [32]. The following diagram illustrates the workflow for a standardized protocol, such as for the A549 cell line:
Figure 2: Resazurin Assay Workflow. The process from cell seeding to data analysis for a metabolism-based viability assay.
Optimized Protocol for 2D A549 Cultures (based on [31]):
- Cell Seeding: Seed A549 cells in a 96-well plate at a density optimized for your experiment (e.g., 5,000-10,000 cells/well in 100 µL of culture medium). Allow cells to adhere overnight.
- Treatment: Apply the test compounds to the cells for the desired exposure period.
- Assay Reagent Addition: Prepare a resazurin stock solution in a physiologically balanced buffer (e.g., PBS). Add it directly to the culture medium at a final concentration typically between 10-20% of the total well volume.
- Incubation: Incubate the plate for 1-4 hours at 37°C, protected from light. The incubation time should be determined empirically to ensure the signal is within the linear range of detection without reaching saturation.
- Signal Measurement: Measure fluorescence using a microplate reader with excitation at 560-570 nm and emission at 580-590 nm.
- Standardization Note: For consistency across passages, it is critical to maintain standardized cell seeding densities, passage numbers, and incubation times with the resazurin reagent [31].
Lactate Dehydrogenase (LDH) Release Assay (Non-Invasive Structural Damage)
The LDH assay measures the activity of the cytoplasmic enzyme lactate dehydrogenase, which is released into the culture medium upon cell membrane damage [14] [32].
Detailed Protocol:
- Cell Seeding and Treatment: Seed cells in a culture-grade microplate and treat with the test compound.
- Sample Collection: Following treatment, centrifuge the microplate to pellet cells and debris. Carefully transfer a volume of the supernatant (e.g., 50 µL) to a new optically clear assay plate.
- Reaction Mixture: Add a prepared reaction mixture containing lactate, NAD+, and possibly a tetrazolium salt like INT to the supernatant samples.
- Incubation and Measurement: Incubate the plate at room temperature for 30 minutes. The reaction involves LDH catalyzing the conversion of lactate to pyruvate, generating NADH. NADH then reduces INT to a red formazan product. Measure the absorbance of the formazan product at 490 nm [32].
- Controls: Include a background control (culture medium alone) and a maximum LDH release control (cells treated with a lysis solution) to calculate percent cytotoxicity.
The Scientist's Toolkit: Key Research Reagent Solutions
Table 2: Essential Reagents for Viability Assays
| Reagent / Assay Kit | Function / Principle | Applicable OECD Category |
|---|---|---|
| Tetrazolium Salts (MTT, MTS, XTT) | Reduced by metabolically active cells to colored formazan products [3] [32]. | Cellular Metabolism |
| Resazurin Dye | A cell-permeable indicator reduced to fluorescent resorufin by viable cells [31] [32]. | Cellular Metabolism |
| ATP Detection Reagents | Luciferase-based detection of cellular ATP, which is present only in viable cells [32]. | Cellular Metabolism |
| Trypan Blue Dye | A dye excluded by viable cells but taken up by cells with compromised membranes [14]. | Structural Damage (Invasive) |
| Propidium Iodide (PI) | A DNA-binding dye that enters dead cells, used in flow cytometry and microscopy [14]. | Structural Damage (Invasive) |
| Lactate Dehydrogenase (LDH) Kits | Measures the activity of LDH enzyme released from cells with damaged membranes [14] [32]. | Structural Damage (Non-Invasive) |
| Calcein AM | A cell-permeable, non-fluorescent compound converted to green-fluorescent calcein by intracellular esterases in live cells [14]. | Structural Damage (Invasive) |
Troubleshooting Guides and FAQs
FAQ 1: Our resazurin assay results show high variability between experimental repeats. What could be the cause and how can we improve consistency?
- Potential Cause: Inconsistent cell seeding density or passage number.
- Solution: Standardize your cell culture protocol. Use consistent passage numbers and ensure accurate cell counting before seeding. Using an automated cell counter can improve precision [31] [33].
- Potential Cause: Uneven distribution of cells within the microplate well.
- Solution: Ensure homogeneous cell suspension during seeding. For adherent cells, consider using a well-scanning feature on your microplate reader instead of a single point read to account for heterogeneity [34].
- Potential Cause: Unoptimized or prolonged resazurin incubation time leading to signal saturation.
- Solution: Perform a time-course experiment to determine the optimal incubation period where the signal is in the linear range for your cell type and density [31].
FAQ 2: We suspect our test compounds are interfering with the fluorescence signal in our viability assay. How can we confirm and address this?
- Confirmation Test: Run an interference control. Incubate the resazurin reagent with your test compound in cell-free wells. A higher signal in these wells compared to a resazurin-only blank indicates direct chemical reduction of the dye by the compound [3].
- Alternative Approach: Switch to a different detection method. If you are using a fluorescence-based assay (e.g., resazurin), consider switching to a luminescence-based assay (e.g., ATP detection), as these are generally less prone to chemical interference [32].
- Experimental Design: Include the necessary controls to identify and correct for background interference in your final calculations.
FAQ 3: After cell passaging, we notice a drop in viability measurements even though the cells appear healthy. Why might this happen?
- Potential Cause: The assay may be sensitive to changes in metabolic activity that are transient after passaging. Cells recovering from trypsinization may have temporarily altered metabolism, affecting assays like MTT or resazurin that rely on metabolic reduction [3].
- Solution: Allow a longer recovery time after passaging before performing the assay. Ensure cells are in the log phase of growth and are not too confluent, as contact inhibition can also reduce metabolic activity per cell [3].
- Solution: Validate your findings with a viability assay based on a different principle. For example, combine a metabolism-based assay (resazurin) with a membrane integrity-based assay (Trypan Blue exclusion) to get a more comprehensive view of cell health across passages [14].
FAQ 4: What are the best practices for selecting a microplate to minimize background and meniscus-related issues?
- For Fluorescence Assays: Use black microplates to reduce background noise, crosstalk, and autofluorescence [34].
- For Luminescence Assays: Use white microplates to reflect and enhance weak light signals [34].
- For Absorbance Assays: Use transparent microplates. For UV absorbance below 320 nm (e.g., for DNA/RNA quantification), use cyclic olefin copolymer (COC) plates [34].
- To Reduce Meniscus Formation:
This technical support guide provides standardized protocols and troubleshooting for membrane integrity-based viability assays, which are foundational for ensuring data quality and reproducibility in longitudinal passage studies and drug development workflows. These assays operate on the principle that a intact plasma membrane excludes certain dyes and retains intracellular components, while a compromised membrane does not [35]. The following sections address common researcher challenges with detailed FAQs, troubleshooting guides, and standardized protocols.
# FAQs: Core Concepts and Application
1. What is the fundamental principle behind dye exclusion assays like Trypan Blue? Dye exclusion assays rely on the differential permeability of live and dead cells. Viable cells with intact membranes actively exclude charged dyes like Trypan Blue, propidium iodide (PI), or 7-AAD. Non-viable cells with disrupted membranes cannot prevent dye influx, leading to their staining [36] [35] [37].
2. When should I use an LDH assay instead of a dye exclusion method? The Lactate Dehydrogenase (LDH) leakage assay measures the release of a cytosolic enzyme from cells with damaged membranes [37]. It is particularly useful for:
- High-throughput screening in toxicology, as it can be easily adapted to a plate-reader format [36].
- Situations where direct cell counting is difficult, such as with adherent cultures where supernatant can be easily sampled.
- However, be cautious as substances like metal ions or nanoparticles can interfere with the LDH assay chemistry, and the enzyme can be adsorbed by certain particles, leading to inaccurate results [36].
3. Why might I get viability results over 100% with metabolic assays, and how do membrane integrity assays help? Metabolic assays (e.g., MTT, resazurin) measure cellular reducing capacity, which can be influenced by changes in cell metabolism that are independent of viability, or by direct interference from the test substance [36]. Membrane integrity assays provide a more direct measure of cell death by assessing a physical property—the barrier function of the membrane. They are less susceptible to these interferences and thus cannot yield viability values over 100% [36].
4. How does cryopreservation affect the choice of viability assay? Cryopreserved products like PBMCs often contain more debris and dead cells, which can impact the accuracy of different assays differently [38]. Studies show that while methods like Trypan Blue, flow cytometry (7-AAD/PI), and automated counters (Vi-Cell BLU) are reliable for fresh cells, they can show more variability with cryopreserved samples [38]. Flow cytometry is particularly valuable here, as it can distinguish specific cell subpopulations and their respective viabilities post-thaw [38].
# Troubleshooting Guide: Common Issues and Solutions
| Problem | Possible Cause | Suggested Solution |
|---|---|---|
| High background fluorescence (Flow Cytometry with PI/7-AAD) | Dye concentration too high; insufficient rinsing; excessive incubation time [35]. | Titrate dye to lowest effective concentration; ensure proper wash steps post-staining; strictly adhere to incubation times [39]. |
| "Viability" >100% in metabolic assays | Test substance has intrinsic redox activity or stimulates cellular metabolism [36]. | Switch to a direct membrane integrity assay (e.g., dye exclusion, LDH) to confirm results [36]. |
| Low correlation between assays for the same sample | Assays measure different biological parameters (membrane integrity vs. metabolism); sample contains many early apoptotic cells with intact membranes [35] [40]. | Use a multiplexed approach. For a complete picture, combine a membrane integrity dye (PI) with an apoptotic marker (Annexin V) and a metabolic indicator [40]. |
| Poor precision in sample measurements (Flow Cytometry) | Non-homogeneous cell suspension; pipetting errors; clogged flow cytometer sample probe [38] [41]. | Ensure single-cell suspension by gentle pipetting; calibrate pipettes; clean instrument sample probe per manufacturer's instructions [41]. |
| Overestimation of viability (Microscopy with Trypan Blue) | Subjective counting; faint staining of slightly damaged cells misinterpreted as live; debris misidentified as cells [38] [37]. | Use automated cell counters for objectivity; establish clear, standardized counting criteria; use nuclear stains (DAPI, 7-AAD) in flow cytometry for better distinction from debris [38] [39]. |
# Standardized Experimental Protocols
Protocol 1: Manual Trypan Blue Dye Exclusion Assay
This protocol is a simple, cost-effective method for a quick viability assessment [42] [37].
- Principle: Viable cells exclude the blue dye and appear clear/colorless, while non-viable cells with compromised membranes take up the dye and appear blue [37].
- Materials: 0.4% Trypan Blue solution, cell suspension, hemocytometer, microscope [42].
- Procedure:
- Gently mix 10-20 µL of cell suspension with an equal volume of 0.4% Trypan Blue solution.
- Incubate for 1-5 minutes at room temperature. Note: Do not exceed 10-15 minutes, as extended exposure can be toxic to live cells [37].
- Load a small volume (~10 µL) onto a hemocytometer and cover with a coverslip.
- Observe under a microscope at 10x-20x magnification.
- Count clear (viable) and blue (non-viable) cells in predetermined squares.
- Calculate viability: % Viability = (Number of viable cells / Total number of cells) x 100.
- Pitfalls: Subjective counting; inability to distinguish between dead and early apoptotic cells; dye can bind to serum proteins, causing background [38] [37].
Protocol 2: Flow Cytometry with 7-AAD/Propidium Iodide (PI)
This protocol offers high-throughput, objective quantification of viability and is ideal for multiparametric analysis [38].
- Principle: PI and 7-AAD are DNA-binding dyes that are excluded by viable cells. They only enter cells with lost membrane integrity, binding to nucleic acids and fluorescing red (PI) or far-red (7-AAD) [38] [39].
- Materials: Cell suspension, Propidium Iodide (PI) or 7-AAD stain, Flow cytometry staining buffer (e.g., PBS with 1-2% FBS), flow cytometer.
- Procedure:
- Prepare a single-cell suspension at ~1x10^6 cells/mL.
- Add PI to a final concentration of 0.5-1 µg/mL or 7-AAD as per titration (e.g., 7.5 µM) [38] [39].
- Incubate for 5-15 minutes in the dark at room temperature [38] [39].
- Optional: Wash cells with buffer to remove unbound dye (not always necessary).
- Analyze immediately on a flow cytometer. For PI, use a 488 nm laser for excitation and collect emission at ~610 nm. For 7-AAD, use a 488 nm or 546 nm laser and collect emission at >650 nm.
- Viable cells are negative for the dye; non-viable cells are positive.
- Pitfalls: Requires expensive instrumentation; cells must be in suspension; dye aggregation can cause artifactual staining; potential spectral overlap with other fluorochromes in multicolor panels [36] [38].
Protocol 3: LDH Leakage Assay
This protocol is ideal for high-throughput screening and situations where direct access to cells is limited [36] [37].
- Principle: Damage to the plasma membrane causes the cytosolic enzyme Lactate Dehydrogenase (LDH) to leak into the cell culture supernatant. The released LDH is measured by a coupled enzymatic reaction that converts a tetrazolium salt into a red formazan product, which can be quantified by absorbance [37].
- Materials: Cell culture supernatant, LDH assay kit (typically containing reaction mixture), multi-well plate reader capable of measuring absorbance at ~490 nm.
- Procedure:
- Collect Supernatant: Centrifuge cell culture media (e.g., 250 x g for 5 minutes) to pellet cells and debris. Collect the clear supernatant.
- Prepare Reaction Mix: Prepare the LDH reaction mixture according to the kit instructions.
- Incubate: Add the supernatant to the reaction mix in a multi-well plate. Incubate for 30 minutes at room temperature, protected from light.
- Measure Absorbance: Read the absorbance at 490 nm (formazan peak) and a reference wavelength (~680 nm).
- Calculate: Normalize LDH release from test samples against a "maximal LDH release" control (treated with a lysis buffer) and a "spontaneous LDH release" control (untreated cells) [37].
- Pitfalls: Interference from substances that absorb at 490 nm; serum in media contains LDH and must be accounted for; chemical interference from test compounds (e.g., metal ions) [36].
# The Scientist's Toolkit: Research Reagent Solutions
| Reagent | Function | Key Considerations |
|---|---|---|
| Trypan Blue | Histological dye for manual viability counting; stains non-viable cells blue [42] [37]. | Simple but subjective; potential teratogenic effects; can stain proteins and cell debris [37]. |
| Propidium Iodide (PI) | Fluorescent nucleic acid stain for flow cytometry; labels dead cells [38] [40]. | Membrane-impermeant; excited at 488nm, emits in red spectrum; can be used in combination with Annexin V for apoptosis detection [38]. |
| 7-Aminoactinomycin D (7-AAD) | Fluorescent DNA binder for flow cytometry; labels dead cells [38]. | Membrane-impermeant; excited at 488nm/546nm, emits in far-red spectrum; good for multicolor panels to free up red channel [38]. |
| 4′,6-diamidino-2-phenylindole (DAPI) | Fluorescent DNA stain that can be used as a viability dye in flow cytometry [39]. | Semi-permeable; used at low concentrations for live/dead discrimination; stains dead cells blue, freeing red/green channels [39]. |
| Lactate Dehydrogenase (LDH) Assay Kit | Measures activity of released cytosolic enzyme LDH as a marker of membrane damage [37]. | Suitable for high-throughput; measures a population response, not single cells; susceptible to chemical interference [36] [37]. |
| Crystal Violet | Stains cellular macromolecules including DNA/proteins; used to estimate total attached cell number [36]. | Not a direct viability stain; assumes dead cells detach; useful in combination with other assays (e.g., VVBlue) for normalization [36]. |
# Assay Selection and Workflow Diagram
This decision tree guides the selection of the appropriate membrane integrity assay based on key experimental parameters.
# Membrane Integrity Assay Workflow Comparison
The table below summarizes the key characteristics of the discussed membrane integrity assays to facilitate direct comparison and selection.
| Assay | Readout | Throughput | Cost | Key Advantage | Key Limitation |
|---|---|---|---|---|---|
| Trypan Blue (Manual) | Microscopy / Absorbance | Low | Low | Simple, inexpensive, quick [42] [37] | Subjective, small cell count, cannot detect apoptosis [38] [37] |
| Flow Cytometry (PI/7-AAD) | Fluorescence | Medium-High | High | Objective, multiparametric, high cell count [38] [40] | Requires expensive instrument, complex data analysis [36] [38] |
| LDH Leakage | Absorbance / Fluorescence | High | Medium | High-throughput, works with adherent cells [36] [37] | Susceptible to chemical interference, measures population average [36] |
| Automated Cell Counters | Bright-field / Fluorescence Imaging | Medium | Medium-High | Consistent, automated, good cell count [38] | Higher instrument cost, may struggle with clumpy cells [38] |
| VVBlue Assay | Absorbance | High | Low | Plate-readable, robust rinsing, good for pigments [36] | Requires a "dead cells" control for normalization [36] |
Frequently Asked Questions (FAQs)
Q1: What is the fundamental difference between an MTT assay and an ATP assay when measuring "viability"?
The MTT and ATP assays measure different cellular phenomena, and using them interchangeably as viability assays is a common source of error.
- ATP Assay: Measures the concentration of adenosine triphosphate (ATP), the primary energy currency of the cell. It directly correlates with the number of metabolically active cells present at the moment of lysis and is a robust indicator of cell health and viability [43] [44].
- MTT Assay: Measures the metabolic reduction of a tetrazolium salt to an insoluble formazan product by cellular oxidoreductase enzymes. This is a functional readout of global metabolic activity and can be influenced by factors beyond viability, such as mitochondrial perturbations and changes in metabolic rates that do not immediately lead to cell death [45] [46].
Q2: My MTT assay results show a significant decrease in absorbance, but my ATP assay for the same treatment shows no change. What does this mean?
This discrepancy suggests that your treatment is altering cellular metabolism without causing immediate cell death.
- Interpretation: The treatment may be inhibiting specific metabolic pathways involved in MTT reduction (e.g., the mitochondrial electron transport chain) or causing a general slowdown in metabolism. However, cells remain viable and maintain their baseline energy (ATP) levels. In this context, the ATP assay is a more reliable indicator of true cell viability, while the MTT assay reflects a specific metabolic disruption [45] [46].
Q3: Why is it crucial to optimize serum concentration and cell seeding density in a Glucose Uptake assay?
Serum and cell density are critical confounding variables that can significantly alter experimental outcomes.
- Serum Concentration: Serum contains growth factors, hormones (including insulin), and metabolites that directly regulate glucose metabolism and basal signaling pathways. Fluctuations in serum can dramatically change the background rate of glucose uptake, masking or exaggerating the effect of the treatment being tested [47] [46].
- Cell Seeding Density: The number of cells per well affects intercellular communication, nutrient availability, and the concentration of secreted factors. Over-confluence can lead to nutrient depletion and contact inhibition, which alters the metabolic state of the cells and confounds the results of the glucose uptake measurement [46].
Troubleshooting Guides
MTT Assay Troubleshooting
Table: Common Issues and Solutions for the MTT Assay
| Problem | Potential Cause | Recommended Solution |
|---|---|---|
| High background noise (high OD in blank/control) | Abiotic reduction of MTT by culture media components (e.g., phenol red) or the tested treatment (e.g., nanoparticles). | Include a control well containing culture media and treatment without cells. Subtract this background value from all sample measurements [46]. |
| Precipitate formation after solvent addition | Incomplete solubilization of the formazan crystals. | Ensure the solubilizing solvent (e.g., DMSO) is thoroughly mixed across the well. Confirm the solvent is compatible with your plate type [45]. |
| Inconsistent results between replicates | Inconsistent cell seeding number or uneven distribution of cells. | Optimize and standardize cell seeding protocol. Ensure a homogeneous cell suspension before seeding and gently shake the plate after seeding to distribute cells evenly [46]. |
| No change in OD between treatment and control | MTT concentration is too low or incubation time is too short. | Perform a calibration experiment to determine the optimal MTT concentration and incubation time that yields a linear relationship between cell number and OD [45] [46]. |
ATP Assay Troubleshooting
Table: Common Issues and Solutions for the ATP Assay
| Problem | Potential Cause | Recommended Solution |
|---|---|---|
| Low Signal-to-Noise Ratio | ATP degradation due to inefficient cell lysis or presence of ATPases. | Use a potent, proprietary lysis buffer containing ATPase inhibitors. Perform lysis and measurement rapidly to minimize ATP degradation [43] [44]. |
| Inaccurate cell viability quantification | Variable ATP levels per cell across different cell types or metabolic states. | Do not assume a constant ATP level per cell. Establish a standard curve for each cell type and condition under investigation to correlate ATP concentration with cell number [44]. |
| Luminescence signal is unstable | The luciferase enzyme reaction is time-sensitive. | Read the plate immediately after adding the substrate, following the manufacturer's recommended timing precisely. Use an injector-equipped luminometer if possible [43]. |
Glucose Uptake Assay Troubleshooting
Table: Common Issues and Solutions for the Glucose Uptake Assay
| Problem | Potential Cause | Recommended Solution |
|---|---|---|
| High non-specific uptake | Failure to adequately stop the uptake reaction and wash away non-internalized tracer. | Include a cold-stop solution (e.g., excess unlabeled glucose or a GLUT inhibitor like cytochalasin B) to halt uptake. Perform multiple ice-cold PBS washes to remove extracellular 2-DG [47]. |
| Excessive variability in insulin-stimulated conditions | Inconsistent handling or timing during the acute insulin stimulation step. | Standardize the duration of serum-starvation and the time of insulin exposure across all replicates. Use a timed, multi-channel pipette for adding insulin [47]. |
| No stimulation by a known activator | The tracer (e.g., 2-NBDG) is being metabolized or exported from the cell. | Confirm the specificity of your tracer and detection method. For 2-NBDG, use flow cytometry for direct measurement. For 2-Deoxy-D-Glucose (2-DG), use a kit that specifically detects 2-DG-6-phosphate [47] [48]. |
Experimental Protocols for Standardization
Detailed Protocol: 2-Deoxy-D-Glucose (2-DG) Uptake Assay in L6 Myotubes
This protocol, adapted from a 2025 study on the fungal metabolite Nidulin, provides a robust method for measuring insulin-stimulated and basal glucose uptake [47].
Key Reagents & Materials:
- Differentiated L6 skeletal muscle myotubes
- Krebs-Ringer Phosphate HEPES (KRPH) buffer
- 2-Deoxy-D-[1,2-³H]-Glucose (2-DG) and cold 2-DG
- Insulin solution (e.g., 100 nM)
- Test compound (e.g., Nidulin)
- Cell lysis buffer (e.g., 1% SDS in 0.1N NaOH)
- Scintillation counter and vials
Procedure:
- Cell Preparation: Differentiate L6 myoblasts into myotubes in appropriate culture plates.
- Serum Starvation: Prior to the assay, serum-starve cells for a standardized period (e.g., 2-6 hours) in low-serum medium (e.g., 0.5% horse serum) to establish a basal metabolic state.
- Treatment: Pre-treat cells with your test compound for a predetermined time (e.g., 16 hours for Nidulin [47]).
- Stimulation & Uptake:
- Wash cells twice with warm KRPH buffer.
- Add KRPH buffer with or without 100 nM insulin and incubate for 20 minutes.
- Add the 2-DG mixture (e.g., 10 µCi/mL ³H-2-DG + 0.1 mM cold 2-DG) and incubate for an additional 10-20 minutes.
- Termination: Stop the reaction by rapidly removing the radioactive medium and washing the cells three times with ice-cold PBS.
- Lysis and Measurement:
- Lyse cells with 1% SDS lysis buffer.
- Transfer the lysate to a scintillation vial, add scintillation fluid, and measure radioactivity using a scintillation counter.
- Normalization: Normalize the counted Disintegrations Per Minute (DPM) to the total cellular protein content (determined by a Bradford or BCA assay).
Detailed Protocol: Metabolic Profiling of Antigen-Specific T Cells via Spectral Flow Cytometry
This advanced protocol allows for single-cell resolution analysis of metabolic states in rare cell populations, such as antigen-specific T cells, and is crucial for standardized immunometabolism research [48].
Key Reagents & Materials:
- PBMCs or single-cell suspension from tissue
- MHC class I tetramers or CD137 antibody for antigen-specific cell identification
- Antibody panel against metabolic proteins (e.g., GLUT1, CPT1a, ATP5a)
- Fluorescent metabolic probes (e.g., for glucose or fatty acid uptake)
- SCENITH assay components (e.g., puromycin, translation inhibitors)
- Spectral flow cytometer
Procedure:
- Cell Preparation and Resting: Thaw or prepare PBMCs and rest them for at least 1 hour (or overnight) in complete media with DNase I to ensure cell recovery and a good single-cell suspension [48].
- Surface Staining: Stain cells with MHC class I tetramers and phenotypic antibodies (e.g., CD8, CD45RA, CD27) for 20-30 minutes at 4°C.
- Intracellular Staining for Metabolic Proteins:
- Fix and permeabilize cells using a commercial fixation/permeabilization kit.
- Stain with antibodies against key metabolic enzymes and transporters (e.g., GLUT1 for glycolysis, CPT1a for fatty acid oxidation) [48].
- Functional Metabolic Staining (Optional):
- SCENITH: Incubate cells with puromycin and different metabolic pathway inhibitors (e.g., oligomycin for ATP synthase, 2-DG for glycolysis) to measure metabolic dependencies [48].
- Probe Uptake: Incubate cells with fluorescently labeled glucose (2-NBDG) or fatty acids to measure substrate uptake directly.
- Acquisition and Analysis: Acquire data on a spectral flow cytometer. Use fluorescence minus one (FMO) controls to set gates for metabolic antibodies. Analyze the metabolic protein expression and functional state of the antigen-specific (tetramer+) T cell population.
Signaling Pathways and Experimental Workflows
Insulin-Mediated Glucose Uptake Signaling Pathway
This diagram illustrates the key signaling pathway activated by insulin to stimulate glucose uptake into skeletal muscle and adipocytes, a core process studied using glucose uptake assays [47].
Spectral Flow Cytometry Workflow for T Cell Metabolism
This diagram outlines the experimental workflow for performing single-cell metabolic profiling of antigen-specific T cells, integrating phenotypic and functional analysis [48].
The Scientist's Toolkit: Research Reagent Solutions
Table: Essential Reagents and Kits for Metabolic Activity Assays
| Category | Item | Function & Application Notes |
|---|---|---|
| Viability/Cytotoxicity | ATP Assay Kits (e.g., from Promega, Thermo Fisher) | Gold standard for quantifying metabolically active cells. Ideal for high-throughput screening and cytotoxicity studies in drug discovery [43] [44]. |
| Viability/Metabolic Activity | MTT Reagent | Measures cellular oxidoreductase activity. Critical Note: Optimize concentration and incubation time for each cell line; interpret results as metabolic activity, not direct viability [45] [46]. |
| Glucose Uptake | 2-Deoxy-D-Glucose (2-DG) Uptake Kits (radiolabeled or colorimetric/fluorometric) | Directly measures glucose transporter activity. The radioactive version (using ³H-2-DG) is considered the most accurate [47]. |
| Glucose Uptake | Fluorescent Glucose Analogs (e.g., 2-NBDG) | Used for real-time, single-cell analysis of glucose uptake via flow cytometry or fluorescence microscopy [48]. |
| Metabolic Profiling | Antibodies for Metabolic Proteins (e.g., GLUT1, CPT1a, ATP5a) | Enables quantification of key metabolic transporters and enzymes at the protein level via flow cytometry or western blot [48]. |
| Advanced Metabolic Analysis | SCENITH Assay Components | A flow cytometry-based method to profile cellular metabolic dependencies (glycolysis and mitochondrial respiration) by measuring puromycin incorporation under metabolic inhibition [48]. |
| Cell Culture | Standardized Serum Lots | Using the same batch of serum across passages and experiments is critical for standardizing basal metabolic activity and reducing assay variability [47] [46]. |
Establishing a Standard Operating Procedure (SOP) for Consistent Passage Tracking and Assay Timing
Frequently Asked Questions (FAQs) and Troubleshooting Guides
Sample Preparation and Handling
Q1: My cell viability is consistently below 90% after passaging. What could be the cause? Low post-passaging viability is a common issue, often related to the dissociation method or handling.
- Potential Cause 1: Overly harsh dissociation reagent. Trypsin can cleave surface proteins of interest and damage cells.
- Troubleshooting: Test gentler alternatives like Accutase, collagenase, or Versenne (EDTA) solutions. You must optimize the incubation time and temperature for any new reagent [49].
- Potential Cause 2: Physical damage during processing.
- Troubleshooting: Avoid creating bubbles when pipetting, do not vortex cells vigorously, and ensure centrifugation speed is optimized. Centrifuge at approximately 200 x g for 5 minutes to pellet cells without making them difficult to resuspend [50].
Q2: How can I prevent the introduction of variability from dead cells in my assays? Dead cells can bind antibodies and reagents non-specifically, skewing your data.
- Solution: Incorporate a viability dye into your staining protocol. Dyes like 7-AAD, DAPI, or TOPRO-3 are DNA-binding and cannot penetrate the intact membranes of live cells, thereby staining only dead cells. For experiments requiring cell fixation, use amine-reactive fixable viability dyes instead [50].
- Critical Note: Always choose a viability dye whose emission spectrum does not overlap with the fluorophores used for your other assays [50].
Assay Execution and Timing
Q3: My resazurin (or other viability) assay results are inconsistent between passages. How can I improve reliability? Inconsistencies in viability assays highlight a critical need for standardization of the protocol itself.
- Solution: Develop and adhere to a strict, detailed SOP for the assay. A key step forward is the optimization and use of a standardized protocol for resazurin-based viability assays, as demonstrated in studies aiming to improve cytotoxicity data reliability. This includes defining precise reagent concentrations, incubation times (including a pre-assay cell seeding stabilization period), and data analysis methods [31].
- Action: Create a step-by-step checklist for the assay to ensure every researcher follows the exact same process.
Q4: What is the most important principle for maintaining consistency in a multi-user research environment? The foundation of consistency is the use of Standard Operating Procedures (SOPs) for all critical tasks.
- Explanation: An SOP is a documented set of step-by-step instructions that explains exactly how to complete a specific task or process. Effective SOPs ensure the work gets done correctly and safely, regardless of who performs it [51]. They are crucial for eliminating costly variations, supporting data reproducibility, and capturing institutional knowledge before experienced technicians retire [51].
Data Analysis and Gating
Q5: My flow cytometry plots show a lot of debris and dead cells, making it hard to see the real population. What is the first step I should take? A logical, hierarchical gating strategy is essential for clean data.
- Step 1: Exclude Debris. Plot Forward Scatter-Area (FSC-A) against Side Scatter-Area (SSC-A). Draw a gate (e.g., "P1") around the main cell population, excluding events with low FSC and SSC that represent debris [52].
- Step 2: Exclude Dead Cells. Use your viability dye (e.g., 7-AAD) to create a gate that excludes the positive (dead) cells [52] [50].
- Step 3: Exclude Doublets. Plot FSC-A vs. FSC-W (Width). Single cells will form a linear cluster; doublets or cell aggregates will appear as outliers and should be gated out [52].
Table 1: Key Parameters for Cell Preparation Steps
| Step | Parameter | Recommended Value / Range | Notes / Purpose |
|---|---|---|---|
| Centrifugation | Speed / Time | ~200 x g for 5 min at 4°C | Gentle spin to pellet cells without damage [50] |
| Cell Suspension | Concentration | 0.5–1 x 10^6 cells/mL | Prevents instrument clogging and maintains resolution [50] |
| Viability Threshold | Pre-assay Viability | 90-95% | Ensures healthy, representative cell population [50] |
| Fixation (PFA) | Concentration / Time | 1-4% for 15-20 min on ice | Preserves cell structure for intracellular staining [50] |
Table 2: Common Viability Dyes and Their Applications
| Viability Dye | Compatible with Fixation? | Primary Use Case |
|---|---|---|
| 7-AAD, DAPI, TOPRO-3 | No | Distinguishing live/dead cells in non-fixed samples [50] |
| Amine-reactive dyes (e.g., Fixable Viability Dye) | Yes | Distinguishing live/dead cells in samples that will be fixed for intracellular staining [50] |
| Propidium Iodide (PI) | No | Classic dead cell stain for flow cytometry; also used in apoptosis assays with Annexin V [52] |
| Resazurin | N/A (Metabolic Assay) | Measures metabolic activity as a proxy for viability in population-based assays [31] |
The Scientist's Toolkit: Research Reagent Solutions
Essential Materials for Consistent Passage and Viability Tracking
| Item | Function / Explanation |
|---|---|
| Gentle Dissociation Reagents (Accutase, Versenne) | Alternatives to trypsin for creating single-cell suspensions with minimal damage to surface proteins and cell health [49]. |
| DNA-binding Viability Dyes (7-AAD, DAPI) | Used to identify and gate out dead cells in flow cytometry based on compromised membrane integrity [50]. |
| Fixable Viability Dyes | Amine-reactive dyes that covalently label dead cells before fixation, allowing for live/dead discrimination in fixed/permeabilized samples [50]. |
| FcR Blocking Reagent | Prevents non-specific antibody binding by blocking Fc receptors on cells, reducing background noise in staining protocols [50]. |
| Resazurin Sodium Salt | A cell-permeable blue dye used in viability assays; reduced by metabolically active cells to pink, fluorescent resorufin [31]. |
| Single-Stained Compensation Controls | Cells or beads stained with a single fluorophore, essential for correctly calibrating the flow cytometer and subtracting spectral overlap in multicolor experiments [52] [53]. |
Experimental Workflow and Troubleshooting Diagrams
Diagram 1: Hierarchical Gating Strategy for Flow Cytometry
Diagram 2: Troubleshooting Low Viability After Passaging
Technical Support Center: Troubleshooting Guides and FAQs
Frequently Asked Questions (FAQs)
Q: Our viability readings are inconsistent across different passages of the same cell line. What could be causing this?
A: Biological variability is a recognized challenge in cell-based models, including those derived from human induced pluripotent stem cells (hiPSCs). This variability can be linked to factors such as cell passage number, genomic instability over time, and inconsistencies in differentiation protocols or local laboratory practices [54]. Ensuring accurate cell enumeration during passaging and using qualified reagents is crucial for maintaining consistency [55].
Q: How can we improve the reproducibility of our 3D spheroid viability assays?
A: Key strategies include:
- Adopting Standardized Methodologies: Implement a standardized and transparent approach to viability assessments to reduce the scope for manipulation and improve consistency [56].
- Utilizing Automated Deep Learning Pipelines: Employ integrated segmentation and classification workflows, such as a U-Net and CNN hybrid model, to minimize labor-intensive manual analysis and user bias. Such pipelines have demonstrated a 95% prediction accuracy for spheroid segmentation and a 98% R² value for viability classification [57].
- Robust Characterization: Follow established best practices and standards, like those from the International Society for Stem Cell Research (ISSCR), which outline requirements for cell line characterization, including timing of characterizations and establishment of quality control acceptance criteria [54].
Q: Our high-throughput screening is hampered by slow, manual fluorescence analysis. Are there more efficient solutions?
A: Yes, scalable, two-stage deep learning pipelines have been developed to address this exact challenge. These systems automate both the segmentation of 3D spheroids from microscopic images and the estimation of live/dead cell percentages, thereby significantly improving the efficiency and scalability of 3D spheroid evaluations for drug discovery [57].
Q: What are the best practices for ensuring the quality of our cell lines at the start of an experiment?
A: It is critical to:
- Source Cells from Reputable Repositories: Obtain cell lines from authenticated cell banks to prevent misidentification, which is estimated to affect up to a third of all cell lines in use [55].
- Perform Regular Quality Control: Conduct routine microbiological testing (e.g., sterility and mycoplasma testing) and basic cell characterization, including cell viability, morphology, and genomic stability assessments [54].
Troubleshooting Guide
Problem: Poor Cell Growth or Spontaneous Detachment
- Potential Causes: Over-digestion with dissociation enzymes like trypsin; low quality of culture media or supplements; cellular decay due to high passage number [55].
- Solutions: Check the condition and quality of culture/freezing media. Optimize trypsinization time and use qualified serum or serum-free alternatives. Adhere to recommended cell passage numbers [55].
Problem: Cell Clumping in Suspension Cultures
- Potential Cause: Release of sticky nucleic acids from stressed cells [55].
- Solution: Review culture conditions for stressors and consider the use of additional reagents to reduce clumping without affecting viability.
Problem: High Variability in Morphological Metrics
- Potential Cause: Inconsistent imaging conditions or manual measurement techniques.
- Solution: Standardize image acquisition protocols and leverage automated Python libraries (e.g., scikit-image, OpenCV) for morphological analysis, which have been shown to be more efficient and consistent than manual methods [57].
The following tables summarize key quantitative data relevant to establishing a robust cross-passage viability workflow.
Table 1: Performance Metrics of an Automated Deep Learning Viability Pipeline [57]
| Model Component | Metric | Reported Performance |
|---|---|---|
| U-Net (Segmentation) | Prediction Accuracy | 95% |
| U-Net (Segmentation) | Dice Similarity Coefficient (DSC) | High (Precise value not stated) |
| CNN Regression (Viability) | Coefficient of Determination (R²) | 98% |
| CNN Regression (Viability) | Mean Absolute Error (MAE) | Low (Precise value not stated) |
Table 2: Key Morphological Parameters for Spheroid Growth Kinetics [57]
| Morphological Parameter | Description | Application in Cross-Passage Monitoring |
|---|---|---|
| Spheroid Area | The two-dimensional cross-sectional area of the spheroid. | Tracks growth or shrinkage over time and across passages, indicating health or toxicity. |
| Sphericity | A measure of how closely the shape of a spheroid resembles a perfect sphere. | Monitors structural integrity and uniformity, which can decay with passage number. |
| Roundness | Similar to sphericity, it assesses the object's circularity in a 2D plane. | Useful for detecting irregular growth patterns or deformation in later passages. |
Experimental Protocols
Detailed Methodology: Two-Stage Deep Learning Pipeline for Viability
This protocol is adapted from a study that developed a scalable pipeline for 3D spheroid analysis [57].
1. Spheroid Preparation and Live/Dead Assay
- Cell Lines: Use relevant cell lines (e.g., glioblastoma U87, neuroblastoma SH-SY5Y).
- Culture Method: Prepare 3D spheroids using low-adhesion 96-well plates coated with 1% agarose to promote spheroid formation.
- Staining: Perform a live/dead assay using Fluorescein Diacetate (FDA) for live cells (green fluorescence) and Propidium Iodide (PI) for dead cells (red fluorescence). Incubate for 15 minutes at 37°C before imaging [57].
2. Image Acquisition and Preprocessing
- Imaging: Capture fluorescence images using a confocal or phase-contrast microscope.
- Standardization: Resize all images to a standard dimension (e.g., 128x128 pixels) to reduce computational complexity.
- Data Augmentation: Enhance model generalizability by applying random rotations, flips, and brightness/contrast adjustments to the training image set [57].
3. Spheroid Segmentation using U-Net
- Model Training: Train a U-Net model with approximately 500 annotated fluorescence images. Use segmentation masks created in ImageJ as ground truth.
- Hyperparameters: A learning rate of 0.001 for 20 epochs with binary cross-entropy loss is a suitable starting point.
- Validation: Employ a 10-fold cross-validation technique to accurately evaluate model generalization [57].
4. Viability Prediction using CNN Regression
- Input: Use the segmented regions of interest (ROIs) from the U-Net model.
- Model Architecture: A Convolutional Neural Network (CNN) with convolutional layers (ReLU activation), max-pooling, and a regression output layer.
- Ground Truth: Derive viability data from fluorescence intensity ratios of the PI and FDA channels. Validate the model's predictive accuracy using 10-fold cross-validation [57].
Standardized Practices for Cross-Passage Research
To ensure reproducibility and quality in cross-passage studies, align laboratory practices with established guidelines:
- Good Cell Culture Practice (GCCP): Adhere to international principles for standardizing and harmonizing cell and tissue culture laboratory practices, which cover characterization, quality management, and documentation [54].
- Good In Vitro Method Practices (GIVIMP): For regulatory contexts, follow OECD guidelines that expand on GCCP, detailing requirements for facilities, instruments, SOPs, and data reporting [54].
- ISO Standards: Implement formal standards such as ISO 24603:2022 for the biobanking of pluripotent stem cells, which specifies requirements for characterization, microbiological testing, and genetic stability assessment [54].
Workflow and Pathway Diagrams
Cross-Passage Viability Workflow
AI Viability Analysis Pipeline
Research Reagent Solutions
Table 3: Essential Materials for 3D Spheroid Viability Assays
| Reagent / Material | Function / Application | Example Specifications |
|---|---|---|
| Dulbecco's Modified Eagle Medium (DMEM) | A classic, optimized cell culture media used for supporting the growth of various mammalian cells [57] [55]. | Supplement with 10% Fetal Bovine Serum, 1% penicillin-streptomycin, and 1% L-glutamine [57]. |
| Fetal Bovine Serum (FBS) | A rich supplement containing growth-promoting factors, essential for mammalian cell culture [55]. | Quality and application-suitability are critical for healthy cell doubling [55]. |
| Fluorescein Diacetate (FDA) | Cell-permeable dye used in live/dead assays. Metabolized by esterases in live cells to produce green fluorescence [57]. | Incubate for 15 minutes at 37°C. Used in combination with PI [57]. |
| Propidium Iodide (PI) | Cell-impermeable dye that stains nucleic acids in dead cells with compromised membranes, producing red fluorescence [57]. | Incubate for 15 minutes at 37°C. Used in combination with FDA [57]. |
| Agarose | Used to coat the bottom of multi-well plates to create a low-adhesion surface, enabling 3D spheroid formation [57]. | A 1% solution is commonly used for coating wells [57]. |
| Antibiotics (e.g., Penicillin-Streptomycin) | Added to culture media to prevent bacterial contamination of cell cultures [55]. | Used at a 1% concentration in culture media [57]. |
Solving Common Problems: Optimizing Assay Performance and Data Interpretation
Accurate cell viability assessment is a cornerstone of reproducible research in cell biology, toxicology, and drug development. The standardization of these assessments across cell passages is critical, as technical and biological artifacts can lead to misleading false positive and false negative results. This guide details the common causes of these errors and provides standardized troubleshooting protocols to ensure data integrity in your viability studies.
Understanding Cell Viability Methods and Their Pitfalls
Cell viability methods are broadly categorized based on what they measure. The Organisation for Economic Co-operation and Development (OECD) classification provides a standardized framework, grouping methods into those assessing structural damage (non-invasive and invasive), cell growth, and cellular metabolism [1]. Each category has inherent strengths and vulnerabilities to specific types of interference.
The table below summarizes common viability methods and the typical errors associated with each:
Table 1: Common Cell Viability Assays and Associated Error Risks
| Assay Category | Example Assays | Principle of Detection | Common Causes of False Positives | Common Causes of False Negatives |
|---|---|---|---|---|
| Structural Damage (Non-Invasive) | LDH Release, AK Release | Measures enzyme leakage from dead cells with compromised membranes [1]. | High background in untreated samples; leakage from stressed but viable cells [1]. | Enzyme instability; underestimation in co-culture models [1]. |
| Structural Damage (Invasive) | Trypan Blue, Propidium Iodide, Fluorescent DNA-binding dyes | Dyes enter dead cells with damaged membranes and bind to intracellular components [1]. | Prolonged dye incubation penetrating viable cells; spontaneous invagination due to osmolarity/metabolism changes [1]. | Short incubation times missing dead cells; incomplete membrane damage in early apoptosis [1]. |
| Cellular Metabolism | MTT, MTS, XTT, WST-1, Resazurin | Measures metabolic activity of viable cells via enzyme-mediated reduction of a substrate [3]. | Test compounds that are reducing agents (e.g., ascorbic acid); altered metabolism from culture conditions (e.g., confluence) [3]. | Cytotoxicity of the assay reagent (e.g., MTT); culture conditions that slow metabolism (nutrient depletion, pH change) [3]. |
| ATP Content | Luminescent ATP assays | Measures ATP levels, which drop rapidly upon cell death, using luciferase [3]. | Non-cellular ATP contaminants in reagents. | Compounds that affect luciferase activity; rapid degradation of ATP in sampling. |
Diagram 1: Viability methods and their associated error risks.
Troubleshooting Guide: False Positives
A false positive result occurs when an assay incorrectly identifies non-viable cells as viable. This can lead to overestimating the health of a cell population.
Table 2: Troubleshooting False Positives
| Symptom | Possible Cause | Solution |
|---|---|---|
| High signal in negative controls (e.g., no cells) in LDH-type assays. | Background levels of the enzyme (e.g., LDH) in culture medium or serum [1]. | Run a medium-only control and subtract the background signal. Use a serum-free medium during the assay step if possible. |
| Unexpectedly high viability in clearly compromised cultures using dye exclusion (Trypan Blue). | Prolonged incubation with the dye, allowing aggregates to dissociate and penetrate viable cells [1]. | Strictly adhere to recommended incubation times (typically 5-10 minutes). Use automated cell counters for consistency. |
| High signal in metabolic assays (MTT, Resazurin) despite observed cell death. | Chemical interference; test compounds acting as reducing agents (e.g., ascorbic acid, sulfhydryl compounds) [3]. | Run an interference control: incubate the test compound with the assay reagent in a well without cells. Measure non-enzymatic signal generation. |
| Positive staining with viability dyes (e.g., Calcein AM) in sub-optimal conditions. | Changes in osmolarity, metabolism, or spontaneous invagination can cause dye penetration into viable cells [1]. | Ensure culture conditions (pH, osmolarity, nutrients) are optimal. Validate dye concentration and incubation time for your specific cell type. |
Troubleshooting Guide: False Negatives
A false negative result occurs when an assay fails to detect viable cells, leading to an underestimation of cell viability.
Table 3: Troubleshooting False Negatives
| Symptom | Possible Cause | Solution |
|---|---|---|
| Low signal in metabolic assays (MTT, Resazurin) in confluent or stressed cultures. | Altered cellular metabolism; cells in contact inhibition or under nutrient stress have reduced metabolic activity [3]. | Do not rely solely on metabolism-based assays. Use a orthogonal method (e.g., ATP or dye exclusion) to confirm results. Ensure cells are in log-phase growth. |
| Low LDH signal in a cytotoxicity experiment, especially in complex models. | The assay may underestimate cytotoxicity in certain contexts, such as co-cultures with bacteria [1]. | Use a different cytotoxicity endpoint, such as a high-content imaging assay or a different leakage marker (e.g., adenylate kinase). |
| Low signal in ATP assays. | Test compounds may directly inhibit the luciferase enzyme used in the detection kit [3]. | Perform a spike-and-recovery experiment: add a known amount of ATP to compound-treated samples to see if the expected signal is recovered. |
| Cytotoxicity of the assay reagent itself (e.g., MTT formazan crystals puncturing cell membranes) [3]. | The detection reagent is harming the cells during the incubation, reducing the final signal. | Optimize the concentration of the assay reagent and the incubation time to find a balance between signal generation and cytotoxicity. Consider switching to a less toxic tetrazolium (e.g., WST-1) or a real-time assay. |
Diagram 2: Systematic troubleshooting for viability assay errors.
Frequently Asked Questions (FAQs)
Q1: My research requires passaging cells over many generations. How can I standardize viability measurements to ensure consistency across passages? A1: Standardization requires a multi-faceted approach:
- Use a Validated Orthogonal Method: Do not rely on a single assay. Use two methods from different OECD categories (e.g., a metabolic assay like Resazurin and a structural integrity assay like propidium iodide) to cross-validate your results, especially after critical passages [1].
- Establish Strict SOPs: Document and adhere to standardized protocols for cell culture conditions, assay incubation times, and reagent lots to minimize technical variation.
- Use Reference Controls: Include known healthy (high viability) and compromised (e.g., heat-killed, low viability) cell controls in every experiment to monitor assay performance over time [1].
Q2: Why does my MTT assay show high signal even when my cells look unhealthy under the microscope? A2: This common false positive can have several causes:
- Chemical Interference: Your test compound may be chemically reducing the MTT tetrazolium to formazan without the involvement of cellular enzymes. Always run an interference control (compound + reagent, no cells) to check for this [3].
- Shifting Metabolism: While the cells may be stressed and morphologically changed, their metabolic activity might still be high enough to reduce the MTT. Combining MTT with a dye exclusion assay can resolve this contradiction.
Q3: For flow cytometry, how can I prevent false positives in my viability dye staining? A3: The key is proper control selection, much like in spectral unmixing [58].
- Rule of "Like-With-Like": The autofluorescence of your positive and negative control populations must be identical. For a viability dye, use heat-killed cells as your positive control and unstained, healthy cells as your negative control. Do not use unstained dead cells, as they have different autofluorescence than live cells [58].
- Bright is Better: Ensure the fluorescence intensity of your stained positive control is as bright or brighter than in your experimental multi-color sample [58].
Experimental Protocol: Performing a Robust MTT Viability Assay
This protocol is adapted from the Assay Guidance Manual [3] and includes critical steps to mitigate false positives and negatives.
Principle: Viable cells with active metabolism reduce the yellow, water-soluble MTT tetrazolium salt to purple, insoluble formazan crystals. The amount of formazan, solubilized and measured spectrophotometrically, is proportional to the number of viable cells.
Materials:
- MTT Solution: 5 mg/mL MTT (Thiazolyl Blue Tetrazolium Bromide) in DPBS. Filter sterilize (0.2 µm) and store protected from light at 4°C.
- Solubilization Solution: 40% Dimethylformamide (DMF), 2% Glacial Acetic Acid, 16% Sodium Dodecyl Sulfate (SDS), pH adjusted to 4.7.
- Equipment: CO₂ Incubator, plate-reading spectrophotometer.
Procedure:
- Cell Seeding: Seed cells in a 96-well plate and apply experimental treatments. Include a cell-free "background" control well with just culture medium.
- Assay Initiation: After treatment, carefully add MTT solution to each well to a final concentration of 0.5 mg/mL (e.g., add 10 µL of 5 mg/mL MTT to 100 µL of medium).
- Incubation: Incubate the plate for 1-4 hours in a cell culture incubator (37°C, 5% CO₂). Critical Step: Do not exceed 4 hours, as the MTT reagent can become cytotoxic and induce false negatives [3]. Optimize the time for your cell line.
- Solubilization: Add a volume of solubilization solution equal to the original culture volume (e.g., 100 µL). Wrap the plate in foil and incubate at 37°C overnight or until all formazan crystals are dissolved.
- Measurement: Mix the solution gently by pipetting and measure the absorbance at 570 nm. Use a reference wavelength of 630-750 nm to subtract background noise.
Troubleshooting Notes:
- False Positive Check: Run an "interference control" plate with test compounds and MTT reagent in medium but no cells. Elevated absorbance indicates chemical reduction.
- Linearity Check: Plate a serial dilution of cells to ensure the signal is linear with your cell number range. Loss of linearity at high confluence suggests contact-inhibited metabolism, a potential source of false negatives [3].
The Scientist's Toolkit: Key Reagent Solutions
Table 4: Essential Reagents for Cell Viability Assessment
| Reagent | Function | Key Consideration for Standardization |
|---|---|---|
| Tetrazolium Salts (MTT, MTS, WST-1) | Reduced by metabolically active cells to colored formazan products [3]. | MTT is cytotoxic; MTS/WST-1 are less toxic and yield soluble formazan, but may require an intermediate electron acceptor. |
| Resazurin | Viable cells reduce blue, non-fluorescent resazurin to pink, fluorescent resorufin [3]. | Allows for real-time, kinetic measurements as it is less toxic. Can be used for long-term monitoring. |
| Lactate Dehydrogenase (LDH) | Cytosolic enzyme released upon membrane damage; measured in supernatant [1]. | High background in serum-containing media requires careful background subtraction. Not suitable for all cell models. |
| ATP Detection Reagents | Luciferase enzyme uses ATP from viable cells to produce light [3]. | Highly sensitive. Vulnerable to false negatives if test compounds inhibit luciferase activity. |
| Membrane-Impermeant Dyes (Propidium Iodide, Trypan Blue, DRAQ7) | Bind to DNA or proteins only in cells with compromised plasma membranes [1]. | Incubation time is critical. Prolonged exposure can lead to false positives as dyes penetrate viable cells. |
| Esterase-Activated Dyes (Calcein AM) | Non-fluorescent, cell-permeant dye converted to fluorescent, cell-impermeant calcein by intracellular esterases in live cells [1]. | Can leak out of viable cells over time. Changes in esterase activity independent of viability can affect the signal. |
Optimizing Culture Conditions to Minimize Passage-to-Passage Variability
Frequently Asked Questions (FAQs)
FAQ 1: What are the primary consequences of over-passaging in cell culture? Over-passaging can lead to significant alterations in cell behavior and characteristics, including morphological changes, reduced growth rates, genetic drift, and the loss of critical cell phenotypes. This is a major concern for research that hinges on consistent cell behavior and can result in a distorted shadow of the original cell line's properties [59].
FAQ 2: How does passage number impact the differentiation potential of stem cells? Passage number significantly affects the differentiation efficiency and quality of derived cells. Research on induced pluripotent stem cells (iPSCs) shows that lower passage numbers (e.g., 5-10) produce differentiated sensory neurons that better recapitulate the mature, sensory-like phenotype, with superior expression of key neuronal markers and electrophysiological maturity compared to those from higher passages [60].
FAQ 3: What are the best practices for setting passage number limits? Establish and enforce strict passage number limits as a primary strategy. These limits should be meticulously determined based on the specific cell type, considering factors such as growth rate, morphology, and genetic stability. Using initial passages as a reference point helps anticipate the cell's development trajectory [59].
FAQ 4: Why is it crucial to use low-passage cells for high-stakes experiments? Beginning with cells at the lowest passage number is crucial because such cells are less prone to undesirable alterations and offer the closest representation of their original population. This approach minimizes experimental variability and enhances the likelihood of obtaining consistent and dependable results [59].
Troubleshooting Guides
Issue: High Variability in Experimental Outcomes Between Passages
Potential Causes and Solutions:
- Cause: Genetic and phenotypic drift due to accumulated passages.
- Cause: Inconsistent culture handling leading to selective pressures.
- Solution: Establish and meticulously adhere to Standard Operating Procedures (SOPs) for all cell culture processes. This includes standardizing reagents, trypsinization timing, confluence at harvest, and even incubator placement to minimize unintended variability [62].
- Cause: Undetected morphological and growth rate changes.
- Solution: Implement regular and meticulous monitoring of cell morphology and growth rates. Use these observations as an early warning system to identify signs of over-passaging before they critically impact experiments [59].
Issue: Reduced Differentiation Efficiency or Function in Derived Cells
Potential Causes and Solutions:
- Cause: Starting with iPSCs or progenitor cells at an inappropriately high passage number.
- Solution: For differentiation protocols, particularly for sensitive cell types like neurons, prioritize the use of low-passage parent cell lines. Our data indicates that low-passage numbers (P5-P10) are better suited for generating high-quality, mature sensory neurons [60].
- Cause: Lack of routine verification of cell health and identity.
- Solution: Beyond passage number, routinely verify cell identity (e.g., via STR profiling) and monitor key performance metrics to ensure the cells remain fit for their intended purpose over the long term [61].
Experimental Data and Protocols
Quantitative Impact of Passage Number on iPSC-Derived Sensory Neurons
The following data summarizes key findings from a study investigating the effect of iPSC passage number on the quality of differentiated sensory neurons (iPSC-dSNs) [60].
Table 1: Effect of Passage Number on Neuronal Marker Expression
| Marker Gene | Function | Low Passage (LP) | Intermediate Passage (IP) | High Passage (HP) | Significance (LP vs. HP) |
|---|---|---|---|---|---|
| PAX6 | Immature neural progenitor marker | Lower expression | Higher expression | Highest expression | FDR = 0.006 (LP vs. IP); 1.1x10⁻⁴ (LP vs. HP) |
| TRPM8, SCN9A, etc. | Mature sensory neuron markers | Highest expression | Intermediate expression | Lower expression | FDR range: 0.04 to 1.7x10⁻⁵ |
Table 2: Effect of Passage Number on Electrophysiological Properties
| Electrophysiological Parameter | Low Passage (LP) | Intermediate Passage (IP) | High Passage (HP) |
|---|---|---|---|
| Average Cell Size (µm) | 14.38 ± 1.60 | 11.75 ± 1.38 | 12.67 ± 1.16 |
| Sodium Current Density | Significantly higher | Intermediate | Significantly lower |
| Electrophysiological Maturity | Superior | Intermediate | Inferior |
Detailed Protocol: Monitoring Passage-Associated Variability
This protocol outlines a methodology to systematically assess the impact of passage number on cell quality, based on the experimental approach used in [60].
Objective: To evaluate the phenotypic and functional stability of a cell line across sequential passages.
Materials:
- Cell line of interest
- Standard cell culture reagents and equipment
- Flow cytometer (for pluripotency/stemness markers, if applicable)
- RNA-seq or qPCR equipment (for gene expression)
- Electrophysiology rig (for functional neuronal characterization)
- Immunofluorescence staining supplies
Procedure:
- Cell Culture and Grouping: Culture your cell line and define passage number groups (e.g., Low: 5-10, Intermediate: 20-26, High: 30-38). Use consistent culture conditions for all groups.
- Pluripotency/Health Check (Pre-differentiation):
- Assess morphology using phase-contrast microscopy for expected colony formation or typical cell shape.
- Quantify the expression of key pluripotency markers (e.g., Sox2, Oct3/4, Nanog for iPSCs) or health markers via flow cytometry or RNA-seq to establish a baseline [60].
- Differentiation and Endpoint Analysis: Differentiate cells from each passage group into your target cell type (e.g., sensory neurons).
- Morphology and Basic Staining: At a defined endpoint post-induction, capture phase-contrast images and perform immunofluorescence co-staining for key neuronal markers (e.g., Peripherin and βIII-tubulin) [60].
- Gene Expression Analysis: Use RNA-seq to quantify the expression of critical markers, including:
- Immature neuron marker (e.g., PAX6)
- Mature, lineage-specific markers (e.g., TRPM8, PIEZO2, SCN9A, RUNX1 for sensory neurons) [60].
- Functional Analysis: For excitable cells like neurons, perform electrophysiological characterization:
- Measure cell size and membrane capacitance.
- Record sodium current amplitudes and density to assess functional maturity [60].
The Scientist's Toolkit: Research Reagent Solutions
Table 3: Essential Materials and Reagents for Monitoring Cell Stability
| Item | Function/Benefit | Example Vendors/Tradenames |
|---|---|---|
| Cryopreservation Media | Preserves early-passage cells for long-term storage, creating a uniform genetic record. | Various |
| Cell Counters & Viability Stains | Accurately quantify cell number and assess viability during passaging. | Trypan Blue; Automated Cell Counters (e.g., Bio-Rad TC20, ThermoFisher Countess II) [14] |
| Membrane Integrity Dyes | Distinguish live/dead cells based on plasma membrane integrity. | Propidium iodide, SYTOX, DRAQ7, CellTox Green [14] |
| Metabolic Activity Assays | Assess cell health and proliferation status. | MTT, WST-1, MTS, ATP assays [14] |
| Cytotoxicity Assay Kits | Measure compound-induced cytotoxicity, often by detecting leaked enzymes. | LDH assay kits, ToxiLight BioAssay (AK detection) [14] |
| Antibodies for Cell Death Pathways | Detect specific cell death pathways (e.g., apoptosis). | Annexin V, Caspase activation antibodies [14] |
| Cell Culture Management Software | Tracks passage numbers, manages cell stocks, and provides alerts to prevent over-passaging. | Various SaaS products, LIMS, ELNs [59] |
Experimental Workflow and Pathway Diagrams
Workflow for Mitigating Passage Variability
Passage Number Impacts Differentiation
This guide provides targeted troubleshooting for two common problems in viability assays: fluorescent dye leakage and enzyme inactivation. Ensuring consistent results for these issues is critical for standardizing viability assessments across cell passages, a cornerstone of reproducible research in drug development.
Troubleshooting Fluorescent Dye Leakage
Fluorescent dyes are vital for marking cells, but their unintended leakage can compromise data integrity.
Common Causes and Solutions
| Problem Cause | Symptom | Solution |
|---|---|---|
| Prolonged Incubation | High background fluorescence; loss of specific signal. | Optimize and shorten dye incubation time; perform a time-course experiment to find the minimum effective incubation. |
| Inadequate Washing | High fluorescent background in negative controls. | Increase wash steps post-staining; include a stop-wash step with cold buffer to halt dye uptake [63]. |
| Cell Membrane Damage | Rapid signal loss over time; correlated with reduced cell viability. | Ensure cell health before assay; avoid harsh handling; use healthier, earlier-passage cells. |
| Incorrect Dye Concentration | Signal too weak or excessive, leading to diffusion. | Titrate the dye to determine the optimal concentration that provides a strong, stable signal. |
Expert-Recommended Protocol: Penetrant Dye Test
A method adapted from component qualification can be used to identify leakage pathways definitively [63].
- Sample Preparation: Apply the fluorescent dye solution to your cell sample under controlled, pressurized conditions to force penetration into any potential leaks or cracks.
- Cleaning: Thoroughly clean the external surface of the sample to remove all non-penetrated dye.
- Inspection: Examine the sample under high magnification with a UV light source. Any evidence of dye in unintended areas constitutes a failure and identifies a leakage path [63].
Troubleshooting Enzyme Inactivation
Unexpected loss of enzyme activity can halt biochemical assays. The protocol below is a general guide for studying enzyme inhibition, which can be adapted for troubleshooting inactivation issues [64].
Common Causes and Solutions
| Problem Cause | Symptom | Solution |
|---|---|---|
| Improper Storage | Gradual loss of activity over time; inconsistent results between batches. | Aliquot and store at recommended temperature; avoid repeated freeze-thaw cycles. |
| Denaturing Conditions | Sudden and complete loss of activity. | Ensure buffer is at correct pH and composition; check for absence of denaturing agents. |
| Presence of an Inhibitor | Reduced reaction rate or no activity. | Check reagent purity; run a control with a new substrate batch; pre-incubate enzyme with inhibitor to ensure proper binding [64]. |
| Missing Cofactor | Low or no activity, even in fresh preparations. | Confirm all essential cofactors (e.g., Mg²⁺, NADH) are added to the reaction mixture [64]. |
Standardized Experimental Protocol
This step-by-step protocol helps systematically identify the cause of inactivation [64].
- Prepare Solutions: Use fresh buffer at the enzyme's optimal pH. Prepare substrate and potential inhibitor compounds in suitable solvents [64].
- Dilute Enzyme: Dilute the enzyme to a concentration that allows for easy measurement of its initial activity.
- Pre-Incubate with Inhibitor: Mix the enzyme with different concentrations of a suspected inhibitor and incubate for a few minutes to allow binding [64].
- Start the Reaction: Add the substrate to the enzyme-inhibitor mixture. Always include a positive control (enzyme with substrate, no inhibitor) and a negative control (substrate only).
- Monitor Reaction Kinetics: Measure the change in absorbance (or other relevant signal) over time using a spectrophotometer or microplate reader.
- Analyze Data: Calculate enzyme activity for each condition. Plot inhibitor concentration against percentage activity to determine the IC₅₀ (the concentration that inhibits 50% of activity) [64].
Essential Research Reagent Solutions
| Reagent/Item | Function in the Context of Viability Assays |
|---|---|
| Fluorescent Dyes (e.g., Rhodamine) | Used to mark cells and track viability; can be applied under pressure to identify leakage pathways [63]. |
| Spectrophotometer / Microplate Reader | Instrument to measure absorbance changes in enzymatic assays, allowing for the quantification of reaction rates and activity [64]. |
| Buffer Solutions | Maintain a stable pH and ionic environment crucial for preserving enzyme structure and function during assays [64]. |
| Enzyme Cofactors (e.g., Mg²⁺, NADH) | Essential ions or molecules required by many enzymes for catalytic activity; their absence causes inactivation [64]. |
| Cell Culture Reagents | Ensure cell health and membrane integrity, which is fundamental for preventing non-specific dye leakage and accurate viability assessment. |
Frequently Asked Questions (FAQs)
Q: My fluorescent dye signal is fading too quickly. Is this leakage or is the dye photobleaching? A: This is a critical distinction. Leakage typically shows as a diffuse signal spreading to surrounding areas or negative controls. Photobleaching is the loss of signal in the specifically stained area when exposed to light. Perform a control experiment by fixing some samples after staining; if signal loss persists, it's more likely leakage.
Q: I suspect an enzyme inhibitor is present in my new substrate batch. How can I confirm this? A: Run a dose-response curve with a known, previously-validated substrate batch and compare the IC₅₀ values for a standard inhibitor. A significant shift in IC₅₀ with the new batch suggests a problem with the substrate. Also, test the new substrate in a control reaction with a different, well-characterized enzyme that uses the same substrate.
Q: How can I standardize viability assays across multiple cell passages? A: The key is controlling variables. Use consistent dye incubation times and washing protocols to prevent leakage. For enzymatic assays, use the same batch of reagents and enzyme source across passages. Regularly passage cells to avoid senescence, and use cells within a defined passage range (e.g., passage 5-15) to minimize genetic drift. Implement robust positive and negative controls in every experiment.
Experimental Workflow for Assay Troubleshooting
This diagram outlines a logical, step-by-step workflow for diagnosing and resolving the assay issues discussed in this guide.
Best Practices for Sample Handling, Storage, and Staining to Ensure Consistent Results
Frequently Asked Questions
Q1: Our resazurin assay results for A549 cells show high variability between passages. What is the root cause and how can we improve consistency? High variability in resazurin assays often stems from non-standardized protocols for incubation time, cell confluence, and wavelength detection [31] [65]. To ensure consistency:
- Adhere to a Standardized Protocol: Follow a detailed SOP specifically optimized for A549 cells [65].
- Optimize Incubation Time: For A549 cells, test incubation times between 0.5 to 4 hours to find the linear range for your specific cell densities [65].
- Control Cell Confluence: Seed cells within the validated range (e.g., ~3.5 × 10² to ~9 × 10⁴ cells/cm²) and avoid over-confluence [65].
- Use Defined Wavelengths: Use the optimal excitation/emission wavelengths identified for your system (e.g., λEx 545 nm / λEm 590 nm) [65].
Q2: How should we handle and store our cell samples to maintain viability for flow cytometry? Improper handling is a major source of degradation. Key practices include [66] [67] [68]:
- Maintain Cold Temperature: Perform all staining steps on ice or at 2–8°C with minimal light exposure [66].
- Use Appropriate Buffer: Use a staining buffer containing PBS with 0.5-1% BSA or 5-10% FBS. Add 0.1% sodium azide if you are not recovering cell function [68].
- Avoid Freeze-Thaw Cycles: Aliquot samples and reagents to minimize repeated freezing and thawing [67].
- Fix for Storage: If immediate analysis is not possible, fix stained cells (e.g., with 1-4% paraformaldehyde) and store at 2–8°C for analysis within 3 days [66] [68].
Q3: What is the best way to store biological samples long-term without degradation? The optimal storage temperature depends on the sample type and required longevity [67] [69]:
| Storage Temperature | Recommended Uses | Key Considerations |
|---|---|---|
| Room Temp (15–27°C) | FFPE tissues, stabilized nucleic acids [67] [69] [70]. | Ideal for fixed or preserved samples; RNA degrades rapidly at room temperature without stabilizers [67]. |
| Refrigerated (2–8°C) | Short-term storage of enzymes, antibodies, frequently used reagents [67] [69]. | Prevents degradation of reagents unstable at warmer temperatures; not suitable for long-term sample storage [67]. |
| Freezer (-20°C) | Short-term storage of DNA, RNA, proteins; general reagents [67] [69]. | Prefer non-frost-free freezers to prevent temperature cycling; ice crystals can damage sensitive samples [67] [69]. |
| Ultra-Low Freezer (-80°C) | Long-term storage of tissues, cells, proteins, nucleic acids for retrospective studies [67] [69]. | Practical for most molecular analyses; ensure consistent temperature with monitored units [67] [71]. |
| Cryogenic (-150°C or lower) | Sensitive live cells (stem cells, embryos), irreplaceable samples [67] [69]. | Suspends all biological activity; mechanical freezers minimize cross-contamination risks vs. liquid nitrogen [69]. |
Q4: Our flow cytometry staining has high background. How can we reduce it? High background often results from non-specific antibody binding. To minimize this [66] [68]:
- Block Fc Receptors: Pre-incubate cells with an Fc receptor blocking reagent (e.g., anti-CD16/32 for mouse cells) for 10-20 minutes before adding your staining antibodies [66].
- Use Specialized Buffers for Polymer Dyes: When using antibodies conjugated to Brilliant Violet or similar polymer dyes, add a Brilliant Stain Buffer or Super Bright Complete Staining Buffer to your antibody cocktail to minimize non-specific dye interactions [66].
- Titrate Antibodies: Use the minimum recommended antibody concentration (e.g., 0.1-10 μg/mL) to avoid over-staining [68].
- Wash Thoroughly: After staining, wash cells 2-3 times with ample staining buffer to remove unbound antibody [66] [68].
Troubleshooting Guides
Problem: Low Fluorescence Signal in Resazurin Viability Assay
- Potential Cause 1: Suboptimal incubation time. The incubation period may be too short for the cells to metabolize a detectable amount of resazurin.
- Solution: Perform a time-course experiment (e.g., 0.5, 1, 2, 3, and 4 hours) to determine the linear range of signal increase for your cell density [65].
- Potential Cause 2: Incorrect optical settings.
- Solution: Validate the excitation and emission wavelengths on your plate reader. For A549, 545/590 nm (Ex/Em) has been used successfully [65].
- Potential Cause 3: Cell density is too low.
- Solution: Ensure cells are seeded within an optimal density range and that a firm attachment is achieved post-seeding before adding the reagent [65].
Problem: Poor DNA Quality and Yield from FFPE Tissue Samples
- Potential Cause 1: Inefficient DNA extraction method.
- Solution: Use a validated kit designed for FFPE tissues. Studies show that silica-magnetic particle-based methods (e.g., Promega Maxwell) can provide a favorable combination of high DNA yield and quality [72].
- Potential Cause 2: Incomplete deparaffinization or cross-link reversal.
- Solution: Follow a rigorous deparaffinization protocol (e.g., multiple xylene and ethanol washes) and include the manufacturer's recommended cross-link reversal incubation step [72].
- Potential Cause 3: Using spectrophotometry alone for quality control.
- Solution: Use fluorometric methods (e.g., Qubit) for accurate DNA quantification, as spectrophotometry can be skewed by contaminants [72].
Problem: Unusual Population Spread in Flow Cytometry Analysis
- Potential Cause 1: Loss of cell viability.
- Solution: Start with cells that are >90% viable. Incorporate a fixable viability dye (e.g., LIVE/DEAD Fixable Dead Cell Stain) into your protocol to gate out dead cells during analysis [66].
- Potential Cause 2: Antibody aggregation or improper storage.
- Solution: Store fluorochrome-conjugated antibodies at 2–8°C in the dark. Do not freeze. Centrifuge the vial briefly before use to collect all liquid [66].
- Potential Cause 3: Inadequate sample fixation or storage after staining.
- Solution: If storing stained cells, resuspend them in a commercial fixation buffer and analyze within 3 days [66].
The Scientist's Toolkit: Key Research Reagent Solutions
| Item | Function | Example Use Case |
|---|---|---|
| Resazurin sodium salt | Cell viability indicator; reduced to fluorescent resorufin by metabolically active cells [65]. | Standardized viability assessment for 2D and 3D A549 cell cultures in drug screening [31] [65]. |
| Fc Receptor Blocking Reagent | Blocks non-specific antibody binding via Fc receptors on immune cells, reducing background [66]. | Essential for clear staining of cell surface targets (e.g., CD markers) in flow cytometry [66] [68]. |
| Brilliant Stain Buffer | Prevents non-specific interactions between polymer dyes in flow cytometry panels [66]. | Required when using two or more antibodies conjugated to Brilliant Violet, Super Bright, or similar dyes [66]. |
| Fixable Viability Dye | Distinguishes live from dead cells by staining permeable dead cells; compatible with fixation [66]. | Gating on live cells during flow cytometry analysis, improving data accuracy [66]. |
| Specialized DNA Extraction Kits | Isolate high-quality DNA from challenging samples like FFPE tissues [72]. | Obtaining viable DNA for downstream molecular diagnostics (e.g., NGS) from archived clinical samples [72]. |
| Flow Cytometry Staining Buffer | Provides an optimized medium for antibody staining and washing steps [66] [68]. | Used throughout the flow cytometry protocol to maintain cell stability and washing efficiency [66]. |
Experimental Protocol: Standardized Resazurin Assay on A549 Cells
This protocol is optimized for A549 cells in 2D culture to ensure reliable and consistent cytotoxicity data [65].
Key Materials:
- A549 cell line (e.g., ATCC CCL-185)
- Complete DMEM culture medium (with 10% FBS, 2 mM Glutamine, 1% P/S)
- Resazurin sodium salt
- 1X PBS
- 96-well cell culture plate, clear bottom
- Plate reader capable of fluorescence detection
Workflow: Resazurin Assay
Detailed Procedure:
- Cell Seeding:
- Harvest and count A549 cells using a hemocytometer.
- Prepare cell dilutions in complete DMEM (with 1% FBS) to achieve desired confluencies (e.g., ~9 × 10³ to ~9 × 10⁴ cells/cm²).
- Seed cells in triplicate in a 96-well plate.
- Include triplicate wells containing only resazurin working solution (no cells) as blanks.
Cell Attachment:
- Incubate the seeded plate overnight (e.g., 16-24 hours) at 37°C with 5% CO₂ to allow cells to adhere firmly.
Resazurin Working Solution (WS) Preparation:
- Prepare a 440 µM intermediate stock of resazurin in 1X PBS, sterile filter (0.22 µm), and store at -20°C.
- On the day of the experiment, dilute the intermediate stock in complete DMEM to a final concentration of 44 µM.
Assay Incubation:
- Gently remove the culture medium from the wells.
- Add 100 µL of the freshly prepared 44 µM resazurin WS to each well.
- Return the plate to the incubator (37°C, 5% CO₂) for 1.5 hours. Protect from light.
Fluorescence Measurement:
- After incubation, transfer the metabolized resazurin WS from each well to a new 96-well plate suitable for fluorescence reading.
- Measure the fluorescence intensity using a plate reader with excitation at 545 nm and emission at 590 nm.
Data Analysis:
- Subtract the average fluorescence of the blank wells from all sample readings.
- Plot the corrected fluorescence against cell density or treatment condition. The fluorescence signal is proportional to the number of viable, metabolically active cells.
Experimental Protocol: Cell Surface Staining for Flow Cytometry
This protocol provides a robust method for staining cell surface markers on a single-cell suspension [66] [68].
Key Materials:
- Single-cell suspension (>90% viability)
- Flow Cytometry Staining Buffer (PBS + 0.5-1% BSA or 5-10% FBS)
- Fluorochrome-conjugated antibodies
- Fc Receptor Blocking Solution (optional, but recommended)
- Fixable Viability Dye
- 12 x 75 mm round-bottom tubes or U-bottom plates
- Refrigerated centrifuge
Workflow: Cell Surface Staining
Detailed Procedure:
- Cell Preparation:
- Harvest and wash cells to create a single-cell suspension.
- Adjust concentration to 1-5 × 10⁶ cells/mL in ice-cold Flow Cytometry Staining Buffer.
- Distribute 50-100 µL of cell suspension per tube or well.
Fc Receptor Blocking (Critical for reducing background):
- To prevent non-specific antibody binding, pre-incubate cells with an Fc block reagent.
- For human cells: Use 20 µL of human Fc receptor binding inhibitor per 100 µL of cells for 10-20 minutes on ice [66].
- Do not wash out the blocking reagent before adding antibodies.
Antibody Staining:
- Prepare a master mix of your fluorochrome-conjugated antibodies in staining buffer. If using polymer dyes (e.g., Brilliant Violet), include the appropriate stain buffer.
- Add the antibody mix to the cells.
- Incubate for 30 minutes on ice or at 2–8°C in the dark.
Washing:
- Add 2 mL (for tubes) or 200 µL (for plates) of staining buffer to wash the cells.
- Centrifuge at 400-600 x g for 5 minutes at 4°C. Discard the supernatant.
- Repeat the wash step 1-2 more times.
Viability Staining (if not done prior to fixation):
- Resuspend the cell pellet in a suitable viability dye diluted in staining buffer.
- Incubate for an additional 15-30 minutes in the dark, on ice.
- Wash cells once more as in step 4.
Fixation and Analysis:
- If required, resuspend cells in 100 µL of staining buffer and add 100 µL of fixation buffer (e.g., IC Fixation Buffer) for storage up to 3 days at 2–8°C [66].
- For immediate analysis, resuspend in an appropriate volume of staining buffer.
- Analyze on a flow cytometer as soon as possible.
Ensuring Data Integrity: Validation, Comparative Analysis, and Regulatory Alignment
How to Validate Your Viability Assay for a Specific Cell Line and Passage Range
Validating your cell viability assay for a specific cell line and passage range is a critical step in ensuring the reproducibility and reliability of your research data. Cellular characteristics and responses can drift as cells are passaged, making it essential to establish a validated passage range for your experiments. This guide provides troubleshooting advice and detailed protocols to help you standardize viability assessment across passages.
FAQs: Core Validation Concepts
1. Why is it necessary to validate my viability assay for different passage numbers? As cells undergo repeated passaging, they can experience phenotypic drift, genomic instability, and changes in metabolic activity and growth rates. These alterations can significantly impact how the cells respond to compounds in viability assays, leading to inconsistent results if the passage number is not controlled [73]. Using cells within a validated passage range ensures that your data reflects a consistent biological state.
2. What are the key parameters to define during assay validation? A robust validation should establish acceptable ranges for several key parameters:
- Growth Rate Consistency: The population doubling time should remain stable within your validated passage range [73] [74].
- Assay Performance Metrics: Parameters like Z'-factor (which assesses the assay window's quality), signal-to-background ratio, and coefficient of variation should meet predefined acceptance criteria.
- Critical Response Parameters: For drug testing, metrics such as IC50 or GR50 should not show a statistically significant or biologically relevant drift across passages [73] [74].
3. My assay results are inconsistent. Could passage number be the cause? Yes, passage number is a common source of variability. To investigate:
- Audit Your Records: Check if the inconsistencies correlate with using cells at low versus high passage numbers.
- Check Control Signals: A gradual decline in the signal from your positive (untreated) control wells over multiple experiments can indicate a passage-related decline in cellular health or metabolic activity.
- Run a Passage Comparison Study: Repeat the same experiment using the same cell line at low, middle, and high passages within your typical use range. Significant differences in viability or potency readings confirm passage-dependent effects.
Troubleshooting Guide: Common Issues and Solutions
| Problem | Potential Causes | Recommended Solutions |
|---|---|---|
| Drifting IC50/GR50 values | Phenotypic drift, senescence, loss of specific drug targets, or altered metabolism over passages [73] [74]. | Establish a maximum allowable passage number. Use frozen, low-passage stock vials for new experiments. Implement the more robust GR metric for growth-rate inhibitors [74]. |
| High variability in replicates (Poor Z'-factor) | Inconsistent seeding density, mycoplasma contamination, passage number too low (inconsistent attachment) or too high (senescence), or edge effects in the plate. | Standardize cell seeding protocols. Regularly test for contamination. Define and adhere to a validated passage range. Use plate maps that randomize treatments and include edge wells as buffers. |
| Unexpected signal in cytotoxicity assays | High background in LDH assays from serum in culture medium or spontaneous release from stressed cells [14] [1]. | Include a medium-only background control. Centrifuge plates before sampling supernatant to remove cells. Ensure cells are healthy and not over-confluent before assay. |
| Discrepancy between viability and cytotoxicity readouts | Assays measure different things; a cytostatic agent may stop growth without killing cells, leading to low viability signal but no dead-cell signal [74] [32]. | Multiplex a viability assay (e.g., ATP content) with a cytotoxicity assay (e.g., dead-cell protease) for a complete picture of the cellular response [32]. |
Experimental Protocols for Validation
Protocol 1: Establishing a Validated Passage Range
This protocol helps you determine the range of passages during which your cell line exhibits stable behavior.
Key Reagent Solutions:
- Cell Line of Interest: Use low-passage, master cell bank stocks.
- Validated Viability Assay Kit: e.g., ATP-based (CellTiter-Glo) for viability and LDH-based or dead-cell protease (CytoTox-Glo) for cytotoxicity [32].
- Cell Culture Consumables: Standard media, serum, and trypsin.
Methodology:
- Thaw and Culture: Revive your cell line from a frozen stock (e.g., Passage 3).
- Experimental Design: At every 2-3 passages (e.g., P5, P8, P11, P14, P17), perform a standardized viability/cytotoxicity assay. Include a reference compound if applicable.
- Data Collection: For each passage tested, record:
- Population doubling time.
- Assay raw data (luminescence, fluorescence) for controls and treatments.
- Calculated metrics (IC50, GR50, Z'-factor).
- Data Analysis: Plot the key metrics (e.g., GR50, control signal) against the passage number. The validated range is the contiguous set of passages where these metrics show no significant trend and fall within your pre-defined acceptance criteria.
Protocol 2: Implementing Growth Rate (GR) Metrics for Robust Potency Assessment
Traditional IC50 values are highly sensitive to assay duration and cell division rate. The GR metric, which calculates inhibition on a per-cell-division basis, provides a more robust measure of drug potency, making it less vulnerable to minor, passage-related changes in growth rate [74].
Methodology:
- Cell Seeding: Seed cells in 96- or 384-well plates.
- Treatment and Incubation: Treat cells with a dilution series of your test compound. Include a DMSO/vehicle control.
- Endpoint Measurement:
- At the time of treatment (T0), measure the cell population for a baseline using your chosen assay (e.g., ATP content).
- After the desired incubation period (e.g., 72 hours, T72), measure the cell population again in the same way.
- GR Calculation:
- Use the formula to calculate the GR value for each drug concentration (c):
GR(c) = 2^( log2(X(c)/X0) / log2(Xctrl/X0) ) - 1WhereX(c)is the measured signal at T72 for concentration (c),X0is the signal at T0, andXctrlis the signal of the control at T72. - Calculate GR50 (concentration where GR=0.5) using nonlinear regression of the GR curve. Publicly available GR calculators can automate this process [74].
- Use the formula to calculate the GR value for each drug concentration (c):
Standardization Tools and Visualization
Validating a Viability Assay Across Passages
Monitoring Passage-Dependent Effects
The diagram below illustrates how key cellular and assay parameters can change as a function of passage number, which is critical for determining the validated range.
Research Reagent Solutions for Viability Assay Validation
| Reagent / Solution | Function in Validation | Key Considerations |
|---|---|---|
| ATP Detection Assays (e.g., CellTiter-Glo) [32] | Measures metabolically active cells; high sensitivity and broad linearity. | Excellent for defining growth rates and high-throughput screening. Less suitable for cytostatic agents. |
| Membrane Integrity Dyes (e.g., Trypan Blue, CellTox Green) [14] [32] | Identifies dead cells with compromised membranes. | Can be used for real-time kinetics. Manual counting with trypan blue is low-throughput. |
| Dead-Cell Protease Assays (e.g., CytoTox-Glo) [32] | Measures protease activity released from dead cells. | Highly sensitive; can be multiplexed with viability assays. Low background from viable cells. |
| Metabolic Reduction Assays (e.g., MTT, Resazurin) [73] [32] | Measures metabolic activity via colorimetric/fluorometric change. | Inexpensive. Signal depends on accumulation over time; long incubation can be problematic. |
| Label-Free Viability Tools (AI-driven phase imaging) [75] | Uses AI and quantitative phase imaging to assess viability without labels. | Non-destructive; allows long-term monitoring. Avoids dye-related toxicity. Requires specialized equipment and AI models. |
Performance Metrics of Diagnostic Tests
Diagnostic tests are vital in clinical and research settings, and their performance is quantified using specific statistical measures. Understanding these metrics is essential for correctly interpreting test results and making evidence-based decisions.
Table 1: Key Performance Metrics for Diagnostic Tests [76]
| Metric | Definition | Interpretation | Formula |
|---|---|---|---|
| Sensitivity | The proportion of true positives out of all individuals with the disease. | The ability of a test to correctly identify those with the disease. | True Positives / (True Positives + False Negatives) |
| Specificity | The proportion of true negatives out of all individuals without the disease. | The ability of a test to correctly identify those without the disease. | True Negatives / (True Negatives + False Positives) |
| Positive Predictive Value (PPV) | The proportion of true positives out of all positive test results. | The probability that a positive test result truly indicates the disease. | True Positives / (True Positives + False Positives) |
| Negative Predictive Value (NPV) | The proportion of true negatives out of all negative test results. | The probability that a negative test result truly indicates no disease. | True Negatives / (True Negatives + False Negatives) |
| Positive Likelihood Ratio (LR+) | How much more likely a positive test is in someone with the disease than in someone without it. | Higher values indicate a greater increase in the probability of disease after a positive test. | Sensitivity / (1 - Specificity) |
| Negative Likelihood Ratio (LR-) | How much more likely a negative test is in someone with the disease than in someone without it. | Lower values (closer to zero) indicate a greater decrease in the probability of disease after a negative test. | (1 - Sensitivity) / Specificity |
Application Example
Consider a blood test given to 1,000 individuals. The results were analyzed as follows: [76]
Table 2: Example 2x2 Contingency Table for a Diagnostic Blood Test
| Disease Present | Disease Absent | Total | |
|---|---|---|---|
| Test Positive | 369 (True Positive) | 58 (False Positive) | 427 |
| Test Negative | 15 (False Negative) | 558 (True Negative) | 573 |
| Total | 384 | 616 | 1000 |
Based on this data, the test's performance was calculated as:
- Sensitivity: 96.1%
- Specificity: 90.6%
- PPV: 86.4%
- NPV: 97.4%
- LR+: 10.22
- LR-: 0.043 [76]
This means the test is excellent at ruling out the disease (high sensitivity and NPV) and good at ruling it in (high specificity and PPV). A high LR+ indicates a positive test result significantly increases the likelihood of disease.
Diagram 1: Diagnostic test outcome relationships and key metric formulas.
Standardized Experimental Protocol: Resazurin-Based Viability Assay on A549 Cells
Standardized protocols are critical for improving the reliability and reproducibility of cytotoxicity data in pre-clinical drug screening. The following is an optimized protocol for a resazurin-based viability assay on the A549 human lung carcinoma cell line, suitable for both 2D cultures and 3D fibrin gel models. [31]
Principle
The resazurin assay measures cellular metabolic activity as an indicator of viability. Viable cells with active metabolism reduce the blue, non-fluorescent dye resazurin into pink, highly fluorescent resorufin. The rate of this conversion is proportional to the number of viable cells. [31]
Materials (Research Reagent Solutions)
Table 3: Essential Reagents and Materials
| Item | Function/Description |
|---|---|
| A549 Cell Line | A continuous human lung carcinoma cell line with properties of type II alveolar epithelial cells, used for cytotoxicity studies and drug screening. [31] |
| Resazurin Sodium Salt | The active compound; a blue, non-fluorescent indicator dye that is reduced in viable cells. |
| Cell Culture Medium | Appropriate medium (e.g., DMEM/F12) supplemented with serum for maintaining A549 cells. |
| Test Compounds | Pharmaceutical compounds or treatments whose cytotoxic effects are being evaluated. |
| 96-well or 384-well Microplate | Plate format for culturing cells and performing the assay. |
| Fluorescence Microplate Reader | Instrument for measuring the fluorescence intensity of the reduced product, resorufin (Ex/Em ~560/590 nm). |
Step-by-Step Methodology
- Cell Seeding and Treatment: Seed A549 cells at a standardized, optimized density in a multi-well plate and allow them to adhere overnight. Treat the cells with the desired concentration range of the test compound(s) for a specified duration.
- Resazurin Solution Preparation: Prepare a working solution of resazurin in pre-warmed culture medium or PBS. The final concentration of resazurin must be optimized (a typical range is 10-100 µM).
- Incubation with Resazurin: After the treatment period, remove the treatment medium and add the freshly prepared resazurin working solution to each well. Incubate the plate for a pre-determined, optimized time (e.g., 1-4 hours) at 37°C, protected from light.
- Signal Measurement: After incubation, measure the fluorescence intensity using a microplate reader (Excitation: 530–570 nm, Emission: 580–620 nm; typical peak at 560/590 nm).
- Data Analysis: Calculate the cell viability as a percentage relative to the untreated control cells after subtracting the background fluorescence from blank wells (resazurin solution without cells).
Diagram 2: Resazurin assay workflow for A549 cell viability.
Troubleshooting Guides & FAQs
Reducing Variability in Assays
Q: My assay results are inconsistent between replicates and experiments. What can I do to improve reliability? A: Inconsistent results often stem from technical variability. To improve reliability: [77]
- Proper Sample Handling: Always thaw, vortex, and centrifuge samples (min. 10,000 x g) to remove debris and lipids before use.
- Accurate Pipetting: Use calibrated pipettes and consistent technique. For precision, consider reverse pipetting.
- Reagent Preparation: Warm all reagents to room temperature before use and vortex thoroughly.
- Standardized Incubation: Cover the plate with a sealer and incubate on an orbital shaker at a high speed that does not cause splashing.
- Instrument Maintenance: Check and calibrate your plate reader regularly.
Addressing Low Signal or Bead Counts in Immunoassays
Q: I am running a bead-based immunoassay (e.g., Luminex/MILLIPLEX) and getting low bead counts. How can I fix this? A: Low bead counts can be caused by bead clumping or loss. To correct or prevent this: [77]
- Sample Prep: Ensure samples are thoroughly centrifuged to remove any particulates.
- Wash Buffer: Resuspend the final bead pellet in 1X Wash Buffer (which contains detergent) instead of Sheath Fluid to prevent clumping. Note: The plate must be read within four hours.
- Thorough Washing: Ensure complete washing. When using a handheld magnet, make sure the plate is firmly attached and decant carefully. With a plate washer, check that aspiration is not touching the well bottom.
- Instrument Cleaning: Clean the instrument (e.g., MAGPIX) regularly using enhanced startup or washing procedures.
Optimizing Signal-to-Noise Ratio
Q: My assay has a high background signal, leading to a poor dynamic range. What steps can I take? A: High background is often due to non-specific binding or over-incubation. [77]
- Follow Incubation Times: Do not exceed the specified incubation times for the detection antibody and Streptavidin-PE (SAPE). Over-incubation increases background.
- Ensure Complete Washes: Incomplete washing is a common cause of high background. Use the recommended wash buffer and ensure all washing steps are performed thoroughly.
- Use Blocking Agents: Incorporate appropriate protein blockers (e.g., BSA) in your assay buffer to minimize non-specific binding.
Validating a New Assay
Q: How do I know if my diagnostic or viability test is performing well? A: A well-performing test should be both sensitive (correctly identifies true positives) and specific (correctly identifies true negatives). [76] Calculate the key performance metrics outlined in Section 1 using a validated reference standard. Be aware that sensitivity and specificity are often inversely related; improving one may compromise the other. The clinical or research context will determine the optimal balance.
Accurate cell viability assessment is a critical component of flow cytometry, directly impacting the reliability of data in immunophenotyping, drug screening, and cell sorting. The incorporation of viability dyes into multicolor panels necessitates stringent gating and compensation strategies to distinguish true biological signals from artifacts. Standardizing these assessments, much like the recent push for standardizing resazurin-based assays in pre-clinical drug tests [31], is essential for achieving consistent and reproducible results across experiments and laboratories. This guide addresses specific, common challenges to facilitate robust and standardized viability assessment in flow cytometry.
Standardized Gating Strategy for Viable Cell Identification
A sequential, logical gating strategy is fundamental to accurately isolate single, live cells for analysis.
Key Steps in the Gating Workflow
The following diagram outlines the essential steps for identifying a population of viable, single cells.
Step-by-Step Protocol:
- Exclude Debris: Create a plot of Forward Scatter-Area (FSC-A) versus Side Scatter-Area (SSC-A). Debris, air bubbles, and laser noise typically exhibit low FSC. Draw a gate (often referred to as "Region 1") around the cell populations of interest to exclude these particles [78].
- Exclude Doublets: Apply the "Region 1" gate to a new plot of FSC-Height (FSC-H) versus FSC-A. Single cells will form a diagonal population where height and area are proportional. Doublets or multiplets will have a higher FSC-A for a similar FSC-H and appear above the main population. Gate the single cells to create "Region 2 - Singlet" [78].
- Identify Viable Cells: Apply the "Singlet" gate to a plot of FSC-A versus your Viability Dye channel. Viable cells, which exclude the dye, will be negative. Dead cells, with compromised membranes, will be positive. Gate the negative population as "Region 3 - Viable" [78]. This viable cell population is now ready for subsequent analysis of other markers.
Troubleshooting Guides & FAQs
Frequently Asked Questions
Q1: Why is my viability staining dim, making it hard to distinguish live from dead cells? A: This is typically due to suboptimal dye concentration or staining time.
- Solution: Titrate the viability dye to find the optimal concentration that provides a clear separation between positive and negative populations. Ensure the staining is performed in a buffer without serum or other proteins that might quench the dye. For fixable viability dyes, follow the recommended staining time and temperature before washing.
Q2: My compensation is incorrect for the viability dye, distorting the expression of my other markers. What happened? A: This is a common issue, especially with tandem dyes or improper controls.
- Solution:
- Use Proper Controls: For viability dyes, the Fluorescence Minus One (FMO) control is critical. This should include all fluorophore-conjugated antibodies in your panel except the one for which you are setting the gate (in this case, the viability dye) [78].
- Match Compensation Lots: When using antibodies labeled with tandem fluorophores, use the same antibody lot for compensation as the lot used in your experiments due to potential lot-to-lot variability [78].
- Use Bright Controls: If the signal from your viability-stained cells is weak, use a bright control, such as compensation beads or an antibody targeting a highly expressed marker conjugated to the same viability dye, to set compensation accurately [78].
Q3: My viability dye seems to be staining positive in channels other than its own. How do I fix this? A: This is caused by spectral overlap, where the emission spectrum of the viability dye spills over into other detectors.
- Solution: This requires electronic compensation. Prepare a single-stained control sample only with the viability dye. Use this sample in your flow cytometry software to calculate the compensation matrix that will subtract the spillover signal from all other channels [78].
Troubleshooting Workflow for Poor Viability Resolution
The following flowchart provides a systematic approach to diagnosing and resolving common viability staining issues.
Research Reagent Solutions
Selecting the appropriate reagents is crucial for a successful experiment. The table below details key materials and their functions.
Table 1: Essential Reagents for Viability Staining in Flow Cytometry
| Category | Reagent | Function & Application |
|---|---|---|
| Viability Dyes | Propidium Iodide (PI), 7-AAD | Membrane-impermeant dyes that stain DNA in dead cells. Ideal for end-point assays without fixation [78]. |
| Fixable Viability Dyes (e.g., Zombie dyes, LIVE/DEAD) | Amine-reactive dyes that covalently bind to proteins in dead cells. Compatible with intracellular staining as they survive cell fixation and permeabilization [78]. | |
| Critical Controls | Compensation Beads | Uniform beads that bind antibodies/dyes, used to create bright, consistent single-stained controls for setting compensation [78]. |
| Fluorescence Minus One (FMO) Controls | Control samples containing all fluorophores in the panel except one. Essential for accurate gate placement, especially for dim markers and viability dyes [78]. | |
| Isotype Controls | Antibodies with the same isotype but non-specific specificity. Help identify non-specific antibody binding, though biological controls (e.g., a known negative cell population) are often preferred [78]. | |
| Assay Kits | Resazurin-Based Assay Kits | Used for pre-screening or parallel metabolic viability assessment. Standardized protocols for these assays, as developed for A549 cell lines, improve data reliability in drug screening [31]. |
Quantitative Properties of Common Viability Dyes
Understanding the spectral and functional properties of different dyes is necessary for panel design.
Table 2: Properties of Common Viability Dyes for Panel Design
| Viability Dye | Excitation Laser (nm) | Emission Peak (nm) | Fixable? | Primary Function |
|---|---|---|---|---|
| Propidium Iodide (PI) | 488, 532 | ~617 | No | DNA intercalation in dead cells. |
| 7-AAD | 488, 532 | ~647 | No | DNA intercalation in dead cells. |
| Fixable Viability Dye eFluor 506 | 405, 488 | ~506 | Yes | Protein amine binding in dead cells. |
| Fixable Viability Dye eFluor 780 | 405, 635, 640 | ~780 | Yes | Protein amine binding in dead cells. |
Standardized Experimental Protocol
This protocol is designed to be a standard operating procedure for incorporating a fixable viability dye into a multicolor flow cytometry panel, promoting consistency and reproducibility.
Staining Procedure
- Harvest and Wash: Harvest cells and wash once in cold PBS containing 1% BSA.
- Viability Staining: Resuspend the cell pellet in PBS at a concentration of 1-5 million cells/mL. Add the fixable viability dye at the pre-titrated concentration and incubate for 20-30 minutes at 4°C in the dark.
- Wash: Wash cells twice with PBS/1% BSA to remove any unbound dye.
- Surface Antibody Staining: Resuspend the cell pellet in the pre-titrated cocktail of fluorochrome-conjugated surface antibodies. Incubate for 20-30 minutes at 4°C in the dark.
- Wash and Fix: Wash cells twice and resuspend in a suitable fixation buffer (e.g., 1-4% paraformaldehyde) if required. Analyze on a flow cytometer.
Control Setup
- Compensation Controls: Prepare single-stained controls for every fluorophore in the panel, including the viability dye. Use compensation beads for antibody controls or brightly stained cells for the viability dye control [78].
- FMO Control for Viability Dye: Prepare a sample stained with all surface antibodies but without the viability dye. This control is used to confirm the placement of the viability gate and check for any spillover spreading error into other channels.
In the field of cell-based research, particularly studies involving serial passages, standardizing viability assessment is critical for generating reliable, reproducible data. Such standardization only becomes meaningful when embedded within recognized regulatory and accreditation frameworks. Two systems are paramount for laboratories operating in an international context: the College of American Pathologists (CAP) Accreditation program and the Organisation for Economic Co-operation and Development (OECD) Guidelines for Data Submission. CAP provides a comprehensive checklist-based system for laboratory quality and technical excellence [79], while OECD guidelines establish agreed international standards for test data, ensuring mutual acceptance across member countries. This technical support center article provides researchers, scientists, and drug development professionals with practical guidance for aligning experimental workflows, especially viability assays across passages, with these critical frameworks. Adherence ensures not only regulatory compliance but also the generation of high-quality, defensible data that supports drug development and regulatory submissions.
FAQ: CAP Accreditation and International Data Standards
Q1: What are the most critical changes in the 2025 CAP Accreditation Checklist that affect how we document cell viability and passage history?
The 2025 CAP checklist emphasizes traceability and procedure adherence. For viability and passage research, you must demonstrate:
- Documented Verification of Reagents: Each batch of reagents (e.g., trypsin, growth media) used in passaging and viability testing must have performance verified, and records must be readily available for audit [80].
- Comprehensive Sample Identification: The system for tracking cell lines from receipt through every passage must prevent misidentification. This includes clear labeling that withstands storage conditions [79].
- Validation of Automated Systems: If using automated cell counters or analysis software for viability counts, the entire software environment must be validated to ensure reliable, reproducible results per 21 CFR Part 11 requirements for electronic records [80].
Q2: Our lab uses automated cell counters for viability assessment. How do we validate this system for CAP accreditation and OECD data integrity?
Validating your Statistical Computing Environment (SCE) is mandatory. A robust validation framework involves several key steps [80]:
- Define Requirements & Risk Assessment: Outline what the system must do (e.g., "accurately count cells from passage 1 to passage 10," "distinguish live/dead cells based on staining") and conduct a risk assessment to determine the validation level [80].
- Create a Traceability Matrix: Link each requirement to specific test cases. For example, the requirement "software must correctly calculate viability percentage" is tested by inputting known live/dead counts and confirming the output.
- Execute Testing: Perform both "black-box" testing (verifying end-to-end functionality without knowledge of internal code) and "white-box" testing (examining internal structures and logic) to ensure no errors in data handling or calculation [80].
- Document Everything: Maintain clear documentation including the Validation Plan, Requirements Specification, Test Protocols, and a Final Validation Report. This documentation is primary evidence during a CAP inspection [80] [79].
Q3: How can we structure our electronic records for viability data to satisfy both CAP and OECD expectations?
Both frameworks demand data integrity principles often summarized by ALCOA+: Attributable, Legible, Contemporaneous, Original, and Accurate, plus Complete, Consistent, Enduring, and Available.
- Use Pre-Validated Systems: Whenever possible, use pre-validated cloud solutions designed for regulatory compliance, which include audit trails and secure centralized access [80].
- Implement Robust Audit Trails: Any change to original data (e.g., a viability value) must be recorded in a secure, system-generated audit trail that documents who, what, when, and why the change was made [80].
- Preserve Metadata: For image-based viability assays (e.g., using fluorescent dyes), save files in proprietary formats (like OIR, OIF) that retain all imaging parameters and metadata. Avoid lossy formats like JPEG for primary data [81].
Q4: We are scaling up our passage research for a pre-clinical submission. What are the key GxP considerations for transferring methods from research to a regulated environment?
The transition from research to Good Laboratory Practice (GLP) regulated studies requires proactive planning.
- Early Adoption of cGMP/GLP Reagents: Begin using GMP-grade or clinical-grade reagents during early R&D phases. This smoothes the transition to formal toxicology and clinical studies by eliminating the need to requalify reagent systems [82].
- Process Automation: Introduce laboratory automation to reduce manual handling variability. Automated, high-throughput technologies enhance precision and ensure processes are consistent and documented from the start [82].
- Standardized Procedures Early On: Develop and adhere to detailed, written Standard Operating Procedures (SOPs) for every aspect of cell culture, passaging, and viability assessment, even in early research. This builds a culture of quality and ensures consistency across passages and between scientists [79].
Troubleshooting Common Experimental Issues in a Regulated Context
Problem: Inconsistent Viability Results Between Passages
| Potential Cause | Investigation & Correction | CAP/OECD Compliance Action |
|---|---|---|
| Variation in Reagent Quality | Document the lot numbers and performance of all reagents. Introduce a reagent qualification procedure where new lots are tested in parallel with old lots before use. | Maintain a Reagent Log as part of quality documentation. This provides traceability required for investigations [79]. |
| Inconsistent Sample Preparation | Create a detailed, step-by-step SOP for cell dissociation and washing. Train all staff and document their competency. Use calibrated instruments for timing and volumes. | Archive the validated SOP and training records. CAP checklists require demonstrated competency for all performed procedures [79]. |
| Instrument Calibration Drift | Implement a strict schedule for preventive maintenance and calibration of equipment like incubators, centrifuges, and automated cell counters. | Keep a complete Equipment Maintenance and Calibration Log. This is a core requirement of the CAP checklist [79]. |
Problem: Data Integrity Failure During Audit (e.g., missing metadata, incomplete audit trail)
- Immediate Action: Do not alter the original records. Acknowledge the finding and initiate a formal deviation investigation.
- Root Cause Analysis: Determine if the failure was due to a flawed process, lack of training, or a system limitation.
- Corrective and Preventive Action (CAPA): Update the relevant SOPs, retrain personnel, and potentially upgrade to a pre-validated data management system that enforces compliance by design, preventing such omissions [80].
Essential Reagent Solutions for Standardized Viability Assessment
The table below details key reagents and materials, emphasizing the importance of qualification and documentation for regulatory compliance.
Table: Research Reagent Solutions for Cell Passaging and Viability Assays
| Item | Function in Experiment | Regulatory & Standardization Considerations |
|---|---|---|
| Cell Dissociation Agent (e.g., Trypsin) | Detaches adherent cells for sub-culturing (passaging). | Use clinical-grade versions for GLP studies. Document lot number and expiration date. Performance must be verified to ensure consistent detachment without affecting viability [82]. |
| Defined Culture Medium | Supports cell growth and proliferation across passages. | Avoid uncontrolled, lot-to-lot variability by using serum-free or chemically defined media. Document complete composition. Changes in medium can alter cell health and viability readouts [79]. |
| Viability Stain (e.g., Trypan Blue, Propidium Iodide) | Distinguishes live cells from dead cells for counting. | Validate the staining protocol (concentration, incubation time) for your specific cell line. Document the stain lot number. Inappropriate staining leads to inaccurate viability data [80]. |
| #1.5 Thickness Cover Slips | Holds samples for imaging on microscopes. | Standardize on #1.5 (0.17mm) cover slips. Using an incorrect thickness introduces optical artifacts, compromising the accuracy of image-based viability assays [81]. |
| Appropriate Immersion Oil | Required for high-resolution oil-immorescence microscopy. | Use only the oil specified by the objective manufacturer (e.g., standard vs. silicon oil). Using the wrong oil degrades image quality and can damage the objective [81]. |
Workflow: Integrating CAP & OECD Principles into Viability Assessment
The following diagram visualizes an integrated workflow for conducting viability assessments that incorporates key regulatory principles from both CAP and OECD frameworks, ensuring data is reliable and compliant from experiment design through to reporting and storage.
Conclusion
Standardizing viability assessment across cell passages is not merely a technical formality but a fundamental prerequisite for generating reliable and translatable research data. By integrating the foundational knowledge, methodological rigor, proactive troubleshooting, and robust validation frameworks outlined in this article, research teams can significantly enhance the quality and reproducibility of their work. Future directions must focus on developing more sophisticated, real-time monitoring technologies and universally accepted reference materials to further minimize analytical variability. Ultimately, such standardization is a critical stepping stone toward accelerating successful drug development and improving the predictive power of in vitro models in biomedical science.
References
- 1. An Overview of the Current State of Cell Viability ... [https://www.mdpi.com/1422-0067/26/1/220]
- 2. How and in what situations should viability of specimens ... [https://www.cytometry.org/web/q_view.php?id=78&filter=Set-up%20and%20Validation%20of%20Flow%20Cytometry%20Panels]
- 3. Cell Viability Assays - Assay Guidance Manual - NCBI Bookshelf [https://www.ncbi.nlm.nih.gov/books/NBK144065/]
- 4. WST-1 Assay: principles, protocol & best practices for cell ... [https://www.abcam.com/en-us/knowledge-center/cell-biology/wst-1-assay-principles-protocols-and-best-practices-for-cell-viability]
- 5. Viability Stain Automated Cell Counting [https://logosbio.com/how-to-choose-the-right-viability-stain-for-automated-cell-counting-tb-eb-ao-pi-and-fda-pi-compared/]
- 6. PrestoBlue™ Cell Viability Reagent, 100 mL - FAQs [https://www.thermofisher.com/store/v3/products/faqs/A13262]
- 7. Cell Viability, Proliferation, Cryopreservation, and ... [https://www.thermofisher.com/us/en/home/technical-resources/technical-reference-library/cell-analysis-support-center/cell-viability-proliferation-cryopreservation-apoptosis-support/cell-viability-proliferation-cryopreservation-apoptosis-support-troubleshooting.html]
- 8. Cell viability analytical methods - ISO/DIS 8934-1 [https://www.iso.org/standard/83398.html]
- 9. Cell Culture FAQs [https://lifescience.invitro.com.au/l/cell-culture-faqs]
- 10. Impact of Passage Number on Cell Line Phenotypes [https://www.cytion.com/us/Knowledge-Hub/Blog/Impact-of-Passage-Number-on-Cell-Line-Phenotypes/]
- 11. Functional characterization of a bovine luteal cell culture model [https://journals.plos.org/plosone/article?id=10.1371/journal.pone.0334047]
- 12. Jurkat T-cell lines exhibit marked genomic instability affecting ... [https://pmc.ncbi.nlm.nih.gov/articles/PMC12214745/]
- 13. Cell via Cell Viability Assay Changes Cellular Metabolic ... [https://pmc.ncbi.nlm.nih.gov/articles/PMC10880084/]
- 14. An Overview of the Current State of Cell Viability ... [https://pmc.ncbi.nlm.nih.gov/articles/PMC11719996/]
- 15. Phenotypic and Functional Characterization of Long-Term ... [https://www.nature.com/articles/srep09596]
- 16. Protocol for Passaging Human Pluripotent Stem Cells Non ... [https://www.stemcell.com/enzyme-free-passaging-of-hpscs-using-relesr.html]
- 17. Addressing Sources of Error in the Cell Viability ... [https://www.nist.gov/mml/bbd/biomaterials/addressing-sources-error-cell-viability-measurement-process]
- 18. Raise standards for preclinical cancer research [https://www.nature.com/articles/483531a]
- 19. A Guide to Reproducibility in Preclinical Research - PMC [https://pmc.ncbi.nlm.nih.gov/articles/PMC6314499/]
- 20. Community Survey Results Show that Standardisation of ... [https://pmc.ncbi.nlm.nih.gov/articles/PMC10172263/]
- 21. Fostering Replicability in Preclinical Research [https://www.jax.org/news-and-insights/jax-blog/2025/may/replicability-in-preclinical-research]
- 22. Data standards in drug discovery: A long way to go [https://www.sciencedirect.com/science/article/abs/pii/S1359644624000047]
- 23. Global Standardization of Clinical Research Data [https://www.appliedclinicaltrialsonline.com/view/global-standardization-clinical-research-data]
- 24. How to Evaluate Non-Growing Cells—Current Strategies ... [https://pmc.ncbi.nlm.nih.gov/articles/PMC7912045/]
- 25. A Fast and Easy ATP-Based Approach Enables MIC ... [https://www.frontiersin.org/journals/microbiology/articles/10.3389/fmicb.2019.01365/full]
- 26. viable but non-culturable (VBNC) bacteria [https://microgendx.com/vbnc-viable-but-non-culturable-cells-dectection/]
- 27. Aging and aging-related diseases: from molecular ... [https://www.nature.com/articles/s41392-022-01251-0]
- 28. Flow Cytometry Troubleshooting Guide [https://www.cellsignal.com/learn-and-support/troubleshooting/flow-cytometry-troubleshooting-guide?srsltid=AfmBOor6bQPiZ8JtCnNnAnPOzHdq0XjbVPgSdPK1eV6v-9SkgBvgiQhB]
- 29. Flow Cytometry Troubleshooting Guide [https://www.sigmaaldrich.com/US/en/technical-documents/technical-article/protein-biology/flow-cytometry/flow-cytometry-troubleshooting-guide?srsltid=AfmBOooY2BclAjZBNh70aT7ODe201-U57hN0NrfeagsE5CkiQOkt6jIw]
- 30. Guidelines for the Testing of Chemicals [https://www.oecd.org/en/topics/sub-issues/testing-of-chemicals/test-guidelines.html]
- 31. Standardized Protocol for Resazurin-Based Viability ... [https://pubmed.ncbi.nlm.nih.gov/39682708/]
- 32. How to Measure Cell Viability [https://www.promega.com/resources/guides/cell-biology/cell-viability/]
- 33. Cell viability & viability assays: 7 facts to be aware of [https://www.susupport.com/blogs/knowledge/cell-viability-viability-assays-7-facts-to-be-aware-of]
- 34. The Ultimate Guide to Troubleshooting Microplate Assays [https://bitesizebio.com/81249/troubleshooting-microplate-assays/]
- 35. Membrane Integrity Test - an overview [https://www.sciencedirect.com/topics/engineering/membrane-integrity-test]
- 36. The VVBlue assay: a plate-readable, dye exclusion-based cell ... [https://pubs.rsc.org/en/content/articlehtml/2025/ra/d4ra08606f]
- 37. Trypan Blue - an overview [https://www.sciencedirect.com/topics/pharmacology-toxicology-and-pharmaceutical-science/trypan-blue]
- 38. Assessment and Comparison of Viability Assays for ... [https://pmc.ncbi.nlm.nih.gov/articles/PMC10872314/]
- 39. Evaluating DAPI stain to assess sperm membrane integrity by ... [https://pmc.ncbi.nlm.nih.gov/articles/PMC12537599/]
- 40. Evaluating cell viability assessment techniques: a comparative ... [https://biomedical-engineering-online.biomedcentral.com/articles/10.1186/s12938-025-01452-y]
- 41. Luminex Troubleshooting Guide [https://www.rndsystems.com/resources/protocols/troubleshooting-guide-luminex]
- 42. Trypan blue dye exclusion assay: Principles, protocols, and ... [https://deepscienceresearch.com/dsr/catalog/book/107/chapter/387]
- 43. U.S. ATP Assay Market Trend Analysis Report 2025-2034 [https://uk.finance.yahoo.com/news/u-atp-assay-market-trend-080100094.html]
- 44. U.S. ATP Assay Market Analysis & Outlook 2025–2034 [https://www.gminsights.com/industry-analysis/us-atp-assay-market]
- 45. The MTT Assay : Utility, Limitations, Pitfalls, and Interpretation in Bulk... [https://pubmed.ncbi.nlm.nih.gov/34884632/]
- 46. The MTT Assay: Utility, Limitations, Pitfalls, and ... [https://www.mdpi.com/1422-0067/22/23/12827]
- 47. Nidulin stimulates glucose uptake in myotubes through the ... [https://pmc.ncbi.nlm.nih.gov/articles/PMC12425880/]
- 48. Metabolic profiling of antigen-specific CD8+ T cells by spectral ... [https://pmc.ncbi.nlm.nih.gov/articles/PMC12570331/]
- 49. Flow Cytometry Core: Standard Operating Procedures [https://www.houstonmethodist.org/academic-institute/research/cores/flow-cytometry/standard-operating-procedures/]
- 50. Flow Cytometry Protocol | Abcam [https://www.abcam.com/en-us/technical-resources/protocols/flow-cytometry-for-intracellular-and-extracellular-targets]
- 51. The Beginner's Guide to Standard Operating Procedures ... [https://www.getmaintainx.com/blog/what-is-a-standard-operating-procedure-sop-includes-template]
- 52. Comprehensive Guide to Gating Strategies in Flow Cytometry [https://www.bosterbio.com/blog/post/comprehensive-guide-to-gating-strategies-in-flow-cytometry?srsltid=AfmBOooAresWRqqd6OqXhk14kTUeHhVkdviyPO7CF8AU5hFRk0ESm__I]
- 53. EuroFlow standardization of flow cytometer instrument ... [https://www.nature.com/articles/leu2012122]
- 54. Promoting the adoption of best practices and standards ... [https://pmc.ncbi.nlm.nih.gov/articles/PMC12277813/]
- 55. Cell Culture Troubleshooting [https://www.merckmillipore.com/SB/en/applications/cell-culture-and-cell-culture-analysis/cell-culture-troubleshooting]
- 56. Levelling the Playing Field: Fairer Planning Viability ... [https://www.datainsightsmarket.com/news/article/levelling-the-playing-field-fairer-planning-viability-negotiations-66266]
- 57. A deep learning pipeline for morphological and viability ... [https://pmc.ncbi.nlm.nih.gov/articles/PMC12064216/]
- 58. Spectral Unmixing in Flow Cytometry: 7 Top Tips for Success [https://bitesizebio.com/70438/spectral-unmixing-in-flow-cytometry/]
- 59. Mitigating Over-passaging in Cell Culture: Strategies for ... [https://www.cellportsoftware.com/blog/mitigating-overpassaging-in-cell-culture-strategies-for-maintaining-endpoint-integrity]
- 60. Passage number affects differentiation of sensory neurons ... [https://www.nature.com/articles/s41598-022-19018-6]
- 61. Optimizing Cell Line Stability for Long-Term Research [https://cellculturecompany.com/optimizing-cell-line-stability-for-long-term-research/]
- 62. Designing RNAi Experiments [https://www.thermofisher.com/us/en/home/references/ambion-tech-support/rnai-sirna/tech-notes/controlling-variability-in-cell-assays-when-designing-rnai-exper.html]
- 63. Leakage pathway detection with penetrant dye test [https://www.doeeet.com/content/eee-testing/component-qualification/leakage-pathway-detection-with-penetrant-dye-test/]
- 64. How to Perform an Enzyme Inhibition Assay [https://superchemistryclasses.com/how-to-perform-an-enzyme-inhibition-assay/]
- 65. Standardized Protocol for Resazurin-Based Viability ... [https://pmc.ncbi.nlm.nih.gov/articles/PMC11640476/]
- 66. Staining Cell Surface Targets for Flow Cytometry [https://www.thermofisher.com/us/en/home/references/protocols/cell-and-tissue-analysis/protocols/staining-cell-surface-targets-flow-cytometry.html]
- 67. Safe Storage Temperatures for Biological Materials [https://www.azenta.com/learning-center/blog/safe-storage-temperatures-biological-materials]
- 68. FACS Cell Surface staining Protocol - Flow Cytometry [https://wp.uthscsa.edu/flow-cytometry/resource/facs-cell-surface-staining-protocol/]
- 69. Key Considerations for Reliable Biological Sample Storage [https://www.phchd.com/us/biomedical/blog/key-considerations-for-reliable-biological-sample-storage]
- 70. Sample Preparation Best Practices [https://www.dtr-labs.com/pdf/sample-preparation-best-practices]
- 71. Sample Management: Recommendation for Best Practices ... [https://pmc.ncbi.nlm.nih.gov/articles/PMC4779093/]
- 72. DNA extraction from FFPE tissue samples – a comparison ... [https://pmc.ncbi.nlm.nih.gov/articles/PMC6500389/]
- 73. Assessment of Cell Viability in Drug Therapy: IC50 and ... [https://pmc.ncbi.nlm.nih.gov/articles/PMC11859577/]
- 74. Application of drug-induced growth rate inhibition and ... [https://www.nature.com/articles/s41598-025-86919-7]
- 75. Live-dead assay on unlabeled cells using phase imaging ... [https://www.nature.com/articles/s41467-022-28214-x]
- 76. Diagnostic Testing Accuracy: Sensitivity, Specificity, Predictive ... [https://www.ncbi.nlm.nih.gov/books/NBK557491/]
- 77. Tips & Tricks | Immunoassay Protocols & Troubleshooting [https://www.sigmaaldrich.com/US/en/technical-documents/product-supporting/milliplex/tips-tricks-immunoassay-protocol-troubleshooting-advice?srsltid=AfmBOopeg9OLVYBRp0XnvRcRgNNe6w1nbLoo-vJ-5lc1JjUPj9L5Hu7S]
- 78. Considerations for Flow Cytometry Gating | FACS Analysis [https://www.stemcell.com/considerations-for-facs-gating.html]
- 79. Accreditation Checklists [https://www.cap.org/laboratory-improvement/accreditation/accreditation-checklists]
- 80. 新生物统计团队成功的关键:建立强大的验证流程 - Instem [https://www.instem.com/zh/a-key-to-success-for-new-biostats-teams-building-a-strong-validation-process/]
- 81. 成功重返实验室的4个步骤[+免费故障排除指南] [https://evidentscientific.com/zh/insights/4-steps-to-successfully-return-to-the-lab]
- 82. 生物技术公司如何快速扩大生产规模以满足未来的医疗保健需求 [https://www.thermofisher.cn/cn/zh/home/biotech-lab-solutions/biotech-learning-center/how-biotechs-can-rapidly-scale-up.html]